Of course not the first camera of this kind and I do worry about the build quality BUT at $100 for the camera (lens and accessories are additional $$$$$$) it is quite interesting.
As I said others options do exist and many with a better build quality and additional options, however, anything to keep film and LF alive is cool by me! Ive been shooting a lot of LF in the last few months… but more on that and a review of some LF films and processing options in a few weeks.
The Focal Encyclopedia of Photography, Fourth Edition is a must-have for every serious photographer… period. An earlier edition was a constant resource for me while at RIT and now this newer edition is my Xmas gift to myself this year… it is expensive but well worth it. It is quite thick and full of very useful content on just about every photographic topic imaginable from film to digital and beyond… and if the heat bills get too high this winter I can burn it to stay warm… or my wife could throw it at me to knock some sense into me or perhaps I could learn something about this wonderful medium we all love… either way it will be my constant companion for the dark winter months here in VT. Be sure to add this gem to your holiday wish-list today!
Ok, so lets put everything together and start processing some film. First, be sure to listen/ watch Part 1 and Part 2 prior to this post as there is important information in those posts not covered here. Then click on the Audio Blog Logo to hear an 11 minute summary of tests- what worked and what didn’t- and my thoughts on successful stand development.
Recipes described in the Audio Portion of this post:
Fuji Acros (EI 100 / 125)
800 ML Distilled Water
3 ML R09
200 ML Xtol Developer
1/4 Teaspoon Borax (optional but helps control fog)
1-2 Teaspoons Asorbic Acid (optional)
Process as described for 3 Hours. You can cut this in half for smaller tanks.
Kodak TMY-2 TMAX 400
800 ML Distilled Water
5 ML R09
200 ML Xtol Developer
1/4 Teaspoon Borax (optional but helps control fog)
1-2 Teaspoons Asorbic Acid (optional)
Process as described for 1 – 1.5 hours. You can cut this in half for smaller tanks.
You can use the recipes above for many films… I’d suggest the TMY-2 Reciepe for 2 hours with films such as TX, Delta 100, Delta 400 and HP5… do a test at 2 hours and then one at 3 hours to see what works best for you!
Source for additional Information and example images (good book to buy!):
In this second installment on Stand Development I will outline some basic equipment needed, proper agitation techniques and other necessary processing information…
Stay tuned for the Part 3 in a few days!
Viva la Revolution- Stephen
This is part one in a multi-part article on stand development and semi-stand development (BW) for the purposes of scanning. I have been spending much time looking at different dilutions, different agitation techniques, different recipies and I have come up with a good working solution for my tested films that produces perfect results every time.
To listen to the audioblog portion of this post … just click on the Audio Logo.
Many of you know I really like Diafine Developer (I have written several articles here on its fantastic qualities for scanning)… the techniques I am about to outline have many of the advantages of Diafine but with finer grain and better highlight separation.
Before we get started, here is a shopping list if you want to try this technique for yourself:
Stay tuned for Part 2 in two days!
Viva la Revolution- Stephen
Ethical Note: I do not endorse any vendor of photographic material over another. The links provided above are just an easy source to find the materials needed but by no means are the best or only source.
The final installment of this series provides information on all films tested, thoughts on Zone Plate and Pinhole as it relates to these films and observations and conclusion on this process. The audio portion can be heard by clicking on the Audio logo: note the audio portion is around 16 minutes. Pine, Vermont. 2009
28mm Zone Plate on Leica M7
Overlapping Frame Panoramic Technique (3X)
Film: Kodak TMY-2 (Tmax 400) at an EI of 1600, processed in Xtol Developer.
Printed on Fabriano 640 gsm, edition size one.
Copyright Stephen Schaub 2009
Spring Blossom, Vermont. 2009
28mm Zone Plate on Leica M7
Overlapping Frame Panoramic Technique (3X)
Long Hand Held Exposure, 30 sec +/-
Film: Kodak Ektar 100Printed on Fabriano 640 gsm, edition size one.
Copyright Stephen Schaub 2009
Field Edge, Indian Hill, Vermont. 2009
28mm Zone Plate on Leica M7
Overlapping Frame Panoramic Technique (3x)
Long Hand Held Exposure, 20 sec +/-
Film: Kodak Ektar 100Printed on Fabriano 640 gsm, edition size one.
Copyright Stephen Schaub 2009
In this audio blog I discuss my testing results for Kodak P3200 at an EI of 6400 for hand-held pinhole and zone plate photography as well as the new direction Part 3 in this series will explore. Click on the Audio Logo to listen…
LINK: TMY-2 @ 1600 article here on FR.
If you’re like me you’re always on the lookout for a great black and white film/ developer combo for scanning. I’ve tried many different films and developers and then recently stumbled upon the great marriage of Diafine and TX (Kodak Tri-x)…my new standard. Watch the videos below to learn more about this dynamic combination and for tips on proper processing techniques as well as a few quick tips on scanning black and white negatives. Be sure to also check out my sample pictures under the videos to see just how good it is. (Click on the images for a larger view.)
Video:
Please note that due to YouTube 10 minute video limit I had to break this 12 minute discussion into two parts. (Be sure to watch both videos!)
Video 1
Video 2
Example Pictures:
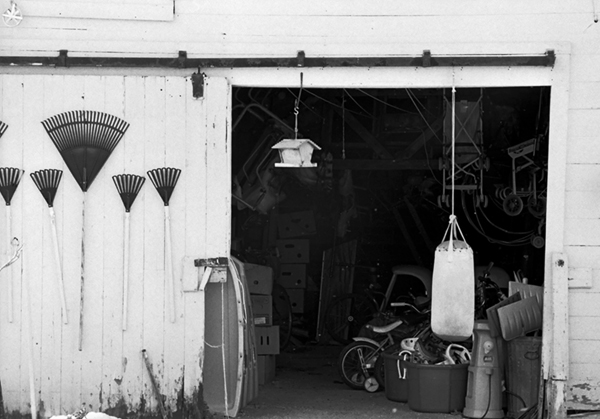
This image illustrates the huge dynamic range possible with TX and Diafine. In this example TX was rated at 1600, 35mm. (Check out that shadow detail!)
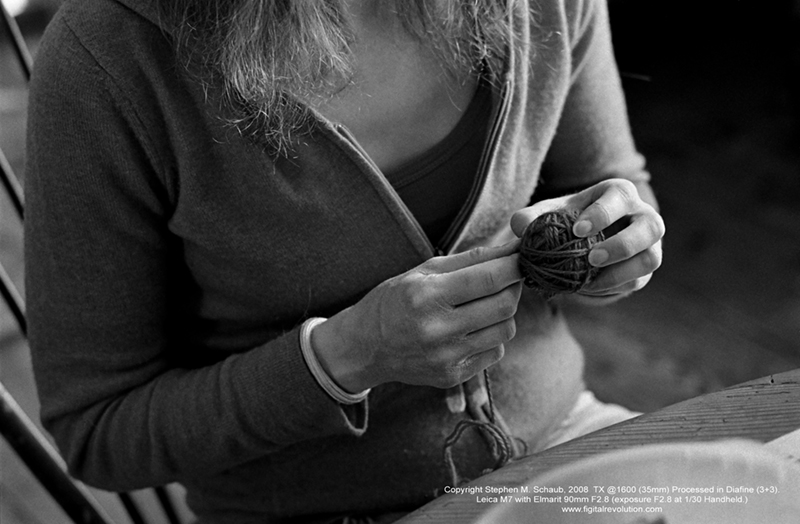
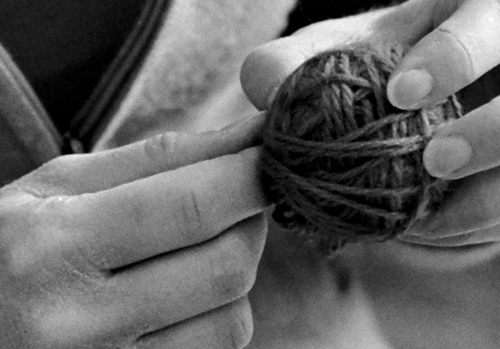
This example is TX at 1600 in low flat lighting…the full print size is 16″x24″ and the crop is a 4″x6″ section out of the full image area. Film size: 35mm
This example and the close up represent TX at 1600. The final image size (print) is 16″x24″ and the crop represents a 3″x3″ area of the final image at full size. Remember…this is TX at 1600 in 35mm!!
Processing Information for Tested Films:
Fuji Acros 100 EI 200 70-75 5+5 (Best choice for really big enlargements and where an EI of 200 is ok.)
FP4 EI 200-250 70-75 3+3 (Very nice but I prefer PMK for FP4).
TMY-2 EI 500-640 70-75 3+3 (Very nice combo but I’d stick with Xtol or D76 1:1…see my review of this film here on the Figital Revolution.)
TX EI 1250-1600 70-75 3+3 (My personal favorite and my new everyday film. I also keep an ND filter with me (.9) for the bright afternoon light and just remove it as the day ends so I can shoot this film all day long on my M7 with no worries!)
All chemicals are mixed with distilled water. Processing is done by hand with stainless steel tanks and reels.
I will be posting Part 2 in a few days which will cover my scanning techniques (specific and general) as well as basic file handling. Part 3 (next week) will focus on the final print and have a demo (yes another video) on hand coating your own paper for inkjet. Stay Tuned!!
For a quick audioblog on my printing techniques and my thoughts on tonality just click on this link: A Fear of Gray
All images and video Copyright Stephen M. Schaub 2008
As promised here is a sample image (my wife Eve Ogden Schaub of Life=Art) in Puerto Rico pushing the new TMY-2 (Tmax 400) to an E.I. of 1600 and processed in Xtol Straight using Kodak’s suggested time/ temp . The light was very, very low as even at an E.I. of 1600 my exposure was still 1/8 at F1.4 (hand-held.) The image was made with a Leica M7 with a 50mm Summilux.
So what are my thoughts????
Please note: click on the thumbnails for a larger view.
1. Of course there is more grain than the 400 speed test I posted a few days ago (click here) but not a lot considering this is a 2 stop push! It is not as crisp and lacks some fine image detail as the other test image had due to the increased grain and I am sure the slow shutter speed and the f1.4 working f stop ( I do the best I can, but on 10 shots of espresso a day what do you expect?)
2. Good shadow detail and the highlights still have nice separation especially considering the light source.
3. Easy to scan- no problems with excessive contrast or anything…the scan was as easy as my last test scan. (Scanned on an Imacon Scanner at 3200 dpi, 16 Bit, wet mount, no sharpening.)
So what does this mean??? Where do we (I) go from here?
Well I for one will shoot this film as my NEW primary film at box speed (400) – but it is nice to know that in a pinch I can push this film to meet my needs no matter what they are… I am going to continue my exploration of different developers (stay tuned!!) for this film, but for now- Xtol works fine. Once again in my opinion – Kudos to Kodak! (It’s been a long while since I’ve been able to say that twice in one week!)


 The Focal Encyclopedia of Photography, Fourth Edition is a must-have for every serious photographer… period. An earlier edition was a constant resource for me while at RIT and now this newer edition is my Xmas gift to myself this year… it is expensive but well worth it. It is quite thick and full of very useful content on just about every photographic topic imaginable from film to digital and beyond… and if the heat bills get too high this winter I can burn it to stay warm… or my wife could throw it at me to knock some sense into me or perhaps I could learn something about this wonderful medium we all love… either way it will be my constant companion for the dark winter months here in VT. Be sure to add this gem to your holiday wish-list today!


 This is part one in a multi-part article on stand development and semi-stand development (BW) for the purposes of scanning. I have been spending much time looking at different dilutions, different agitation techniques, different recipies and I have come up with a good working solution for my tested films that produces perfect results every time.


