Photo Expo Plus 2008 Part 1

Yesterday was a VERY long day back and forth from Vermont to NYC for Photo Expo Plus… but it was well worth it. In the coming days I will be reviewing some of the products that intrigued and impressed me, as well as additional articles on those that DID NOT!

Upcoming articles will include:

Canson Papers….Canson has just released many beautiful fine art paper (18 I think) for the purposes of Inkjet printing. Two that really look amazing are Rives BFK and Arches Platine- both coated for inkjet!!…I will be testing both of these and more in the coming weeks so stay tuned.

Hahnemule Papers….Several new papers and upgrades are in the works for this paper maker (hush hush) so I will post articles and results in the coming weeks.

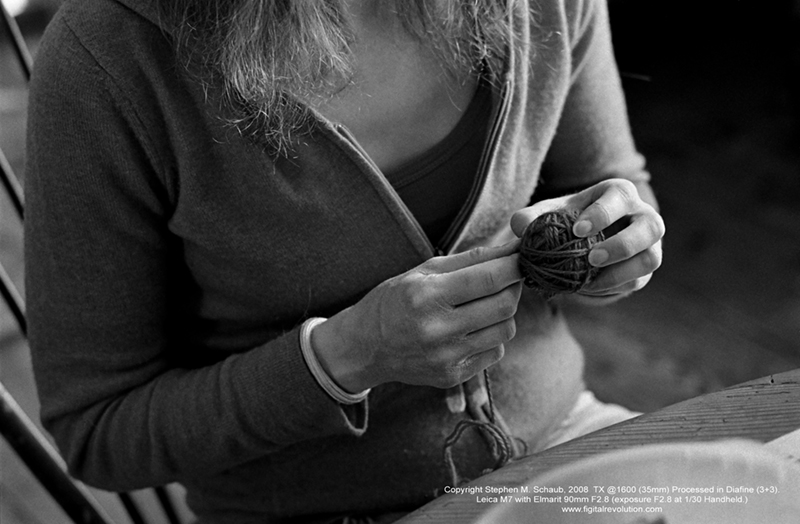
Kodak….I FINALLY got my hands on some of the new Kodak Ektar film and had a great conversation with Scott DiSabato (Marketing Manger Kodak Professional Films). Based on this conversation and sample prints which were available I feel that this film is definitely worth looking at! I will start my testing TODAY so again stay tuned!

I also had a chance to look at many new camera systems and lens options as well as other photographic accessories…it is going to be a busy month! Stay tuned!

It was also great meeting FR readers yesterday and having the opportunity to talk with and in some cases look at your works!

Viva la Revolution!

On a final note: when in NYC try dinner at Artisanal (www.artisanalbistro.com)…the Parmesan Gnocchi slow-cooked in Pork Belly and root Vegetables was, how you say… AMAZING!!!

George Eastman and Kodak for Kids

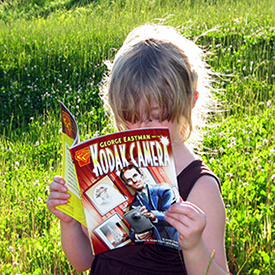
I, like many parents, have a hidden hope that one of my children will someday follow in my footsteps and one day become a photographer… a successful photographer, mind you. My oldest daughter was first introduced to photography when I gave her a Polaroid camera slr 680 (SX-70) at the age of four and then later a lighter new plastic Polaroid Spectra System. She’s now eight and for Christmas received a digital camera from her Uncle Chris and most recently I gave her a 1924 No.2 Kodak Brownie Cartridge Hawk-Eye, Model B from my collection (shoots 120mm, 6×9 cm).

With each new camera comes more questions on photography, art and the general “how do you do that“? Meanwhile, my wife Eve has just returned from a trip to Rochester, NY which included a visit to the George Eastman House – an amazing must pilgrimage for all photographers, whether you like Kodak or not- and purchased a comic book (gotta have a souveneir for the kids!) about George Eastman and the early history of Kodak. I, of course, had to read it (okay, twice) and despite its simplistic narrative it does answer many questions my 8 year old has regarding photography and this “new” Brownie camera she’s received… and it is presented in a manner that is accessable and fun to read. Yes, I know any discussion about Kodak nowadays is fraught with controversy and conflicting opinion but for my daughter it is perfect… and waaay more age appropriate than A World History of Photography by Naomi Rosenblum.

I, for one, would like to let her have her moment of blissful discovery for all things photographic- anger regarding Kodak (not to mention Ilford, Fuji and Agfa (RIP) et al) can come later. You know, like in art school!

Amazon LinK: George Eastman and the Kodak Camera (Inventions and Discovery series)

When Sharp is REALLY Sharp: High Resolution Films, Part 1

I’ve been testing a new film recently, Rollei Pan 25 (120mm) processed in Diafine (3+3) and the initial results are quite amazing! The film does have a bit of a nasty curl to it when dry but nothing a glass carrier or oil mounting for scanning won’t fix… Here is a sample image I made using this film (shot on a 1960 Rollei TLR “F” at f/11 at 1/8th, exposed at BOX speed 25!) as well as two detail crops…just click on the thumbs to get an enlargement.

Note: Z= Zone. Also, the usable dynamic of this film is huge…I have great shadow detail down into Zone II (easily) and the highlights are very clean with nothing blocking up and the grain is almost impossible to find!

The final full size image is 20.7″ x 20.7″ at 360dpi (optical scan resolution 3200, 16Bit). It is important to note that NO SHARPENING was applied in scanning or in post processing and NO NOISE REDUCTION has been applied either…the file is au naturale! I will continue to refine this film/ process over the next few days followed by testing of Efke 25 and then a final comparison between Rollei Pan25, Efke 25 and Kodak Technical Pan Film (I have quite a bit of frozen Tech Pan). All images and tests will be shot on 120mm film. Stay tuned!!

Viva la Revolution!!


What is YOUR Usable EI – Exposure Index?

First a quick bit of background info:

Exposure Index- “EI”- is your personal speed setting for a particular film and developer combo that in most cases is different than the manufacturers posted ISO or ASA data (lots of reasons for this difference) and it reflects a photographer’s specific film requirements with regards to shadow and highlight detail, contrast, grain, etc… Many photographers do extensive testing to determine the best EI for a particular film and developer combo but in the end most photographers settle for a single EI and developer time for a particular film. An example would be- “I shoot Kodak TX at an EI of 1250 and process in Diafine 3+3 at 70F.”

Now for the Diafine Twist:

That tested EI is not the “only perfect EI” but rather just one possible working EI when using Diafine Developer. For example, I have determined that TX processed in Diafine at 3+3 has a USABLE EI range of 400-1250/ 1600…that means that I can rate it at 400 or I can rate it at 1250 if I need to or I can rate it at any in between EI based on subject exposure requirements- there is enough latitude with regards to exposure and development with TX and Diafine that both of these EI are possible for scanning purposes and produce brillant negatives…even one shot right after another on the same roll at a different EI, each would get the same processing time in Diafine– it is like working with the very forgiving Ilford XP2 Super which can handle a range from EI 100-800 (C-41 film) but with real B&W film! (Note: I love XP2 Super but it is a very different looking beast than conventional B&W film.)  With a “normal” developer, say D-76, you would need to increase or decrease your development time or temp or both if you changed your EI beyond half a stop with most black and white films.

So here are a few films I use with their USABLE EI range based on my testing. (NOTE: all USABLE EI listed are for Diafine Processing as outlined here on Figital Revolution.)

  • TX: 400-1250/ 1600 (3+3 at 70F)
  • 125PX: 125-400 (3+3 at 70F)
  • Fuji Acros: 100-200 (4.5 + 4.5 at 70F)
  • TMY-2: 400-640 (3+3 at 70F)
  • FP4+: 100-225 (3+3 at 70F)

Final Thought…why would you want to have a different EI for the same film or know the EI range for a particular film? The answer is flexability (how much can I over or under expose and still get a good negative)- with this approach and knowledge let’s say, for example, I am working with a film like Kodak TX-just load a roll in the morning and start shooting and adjust your USABLE or “flexible” EI as the day and lighting change… when you’re done just process the whole roll with your normal Diafine processing time and scan away! The results are consistantly USABLE and amazing.

28mm Zone Plate meets the M7 and Diafine Developer

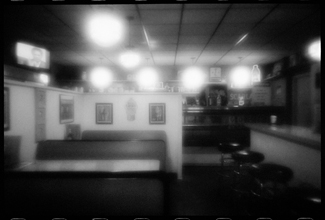
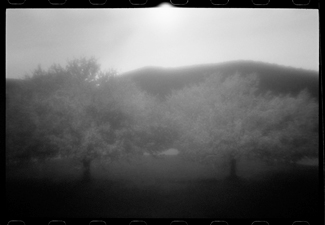
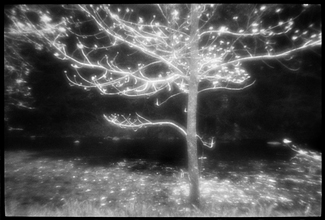
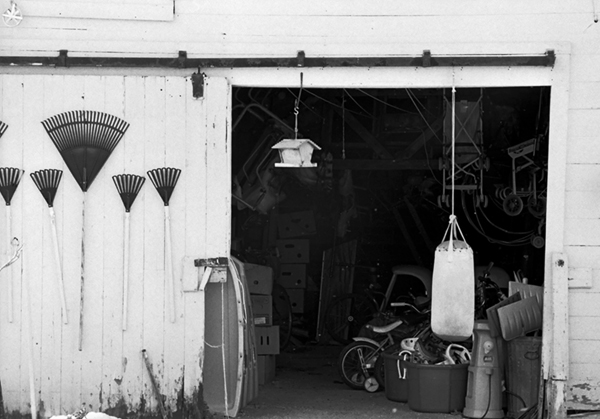
Some years ago I did extensive work with pinholes, Zone plates and Holga camera systems, specifically for my Through A Glass Darkly artworks and book. Recently I decided to give a Zone Plate a try on my Leica M7 (it is a 28mm f/32 Zone Plate I purchased from Pinhole Resources) and TX processed as I have already outlined here on the Figital Revolution using Diafine Developer. It seems to me that this combo of TX/ Diafine/ Zone Plate and Leica M are a perfect combo. The TX and Diafine Developer really help control the Zone Plate with regards to contrast and it also gives me a high enough EI to make hand held shots very possible (my usable range for TX in Diafine is 400-1600). The M7, or really any rangefinder camera system is nice as the image view is not reduced (illumination) by looking through the Zone Plate as would be the case with an SLR (of course this means that you will have to visualize your final image as none of the Zone Plate qualities will be visible until you process your film assuming you’re using a film rangefinder). Of course digital capture would give you instant feed back (did this a few years ago in the American Southwest) but I just love the look of this combo. Scans were done in house at Indian Hill Imageworks on our Imacon Scanner, wet mount at 3200 optical dpi- a few resulting images are below from my first roll…


For more information on using a Zone Plate or for that matter what is a Zone Plate check out the links below.

Viva la Revolution!

Discover X Films! Kodak 125PX in Diafine!

I just couldn’t help myself…I needed to test yet another film in Diafine! What I have discovered has made me very, very happy. If you have been following the progression of articles here on The Figital Revolution I have been posting on Diafine Developer and an array of different black and white films for scanning purposes it should by now be clear by now that I feel that this is a great combo when ease of process, sharpness and huge tonality are required. Yes, there are finer grain developers but this finer grain comes at a cost, namely film speed which is something Diafine has no problem with!

So here is what I have just found….Kodak 125PX in Diafine is a perfect match!!! I’ve never given 125PX much thought until I decided to try this test and the results have made me a convert. I love the look of the grain, it is REALLY sharp and has a beautiful tonal range with a working EI of 320-400. Marry 125PX with my other favorite “X” film TX (EI 1250-1600) and all bases for my needs are covered. Here are two sample pictures made recently on 125PX…the full size image is 16.5″ x 25″. (35mm negative, 6300 optical dpi wet mount scan.)

Please note that the second image was shot under very flat light and scanned at 3150 dpi.

Here is my processing Technique:

  • Diafine Developer at 72-75 F
  • Part A 3 minutes (two inversions every minute…gentle.)
  • Part B 3 minutes (two inversions every minute…gentle.)
  • Water Stop 1 minute Fill and Dump (72-75 F)
  • Fix Kodak Rapid (5 minutes)
  • Wash 1 minute running water (72-75 F)
  • Perma Wash 1 minute constant agitation
  • Wash 5 minutes (68-75 F)
  • LFN
  • Dry

The temperature for the Developer Part A and B is very important. I found that at 68-70 F my negs were a bit thin in the shadows and by increasing the temp just a few degrees (well within the usable range for Diafine of 70-85 F) everything fell right into place. I also now use this time and temp for TX as well – I often soup both films at the same time…very convenient! I no longer use a prewet for Diafine developer as over time it will dilute Part A to a point that could potentially cause problems.

So in conclusion… TX and 125PX are fantastic films and are now my personal films of choice for all of my black and white shooting. Every roll is run in Diafine as described above and the scans are easy and amazing! Give it a try you too may fall for the combo of “X” films and Diafine.

Final Note: I use in my workflow a bit of noise reduction on my images (Noise Ninja). These images are not at the default setting suggested by Noise Ninja but represent NN at about 1/4 strength.

Viva la Revolution!!

Diafine Developer and TX…Part 2.5

060 Filter B+W

OK, this is a quickie. I’ve been running some tests here at Indian Hill Imageworks to determine if using contrast filters such as:

  • Light Yellow 021
  • Light Red 090
  • Yellow Green 060

would cause a problem with this awesome film/ developer combo. Answer: NO. I personally like no filter or a ND if I’m shooting in bright light (remember TX in Diafine has an EI of 1250 to 1600 so unless you like F22 at 1/1000th its ND (Neutral Density) or Contrast Filter time!) I love the full gray tones of this film/ developer combo and find the “straight neg” is the easiest to scan and get every bit of tonality.

NOTE: On the Light Red 090 just be very careful with your shadow placement.

NOTE 2: ONLY use good filters…I like B+W and Heliopan…Yes they are expensive but worth it! Here is great resource for an explanation of Filter Flare and other optical stuff!

What, you say?! No sample pictures with this article (horrors)!!???…Go make them yourself you lazy bum, I’m tired! (A joke, of course- I’m never tired!)

My final article in this series on printing and hand coating your own inkjet papers will be out very soon…stay tuned!

Viva la Revolution!! Stephen Schaub

Scanning, Color Mangement and Photoshop…The Diafine and TX Sage…Part 2

As promised here is the next installment in the ongoing exploration of Diafine Developer and TX. In these videos hybrid artist and master printer Stephen Schaub (The Leader) discusses scanning techniques, color management considerations and Photoshop techniques to maximize your Diafine processed TX negatives!! (Please note that due to a time limitation on Youtube the video has been broken into two parts so be sure to watch BOTH videos!!)

Video ONE

Video TWO

Stay tuned for part 3 of the Diafine and TX saga early next week on the Figital Revolution!

Resource Links

Noise Ninja

Pixel Genius (Photo Kit Sharpening Software)

Kami Scanning Supplies

Ergosoft High Fidelity Inkjet RIP Software

Eizo Monitors

Viva la Revolution!!

Processing Black and White Film for Scanning – Diafine and TX!

If you’re like me you’re always on the lookout for a great black and white film/ developer combo for scanning. I’ve tried many different films and developers and then recently stumbled upon the great marriage of Diafine and TX (Kodak Tri-x)…my new standard. Watch the videos below to learn more about this dynamic combination and for tips on proper processing techniques as well as a few quick tips on scanning black and white negatives. Be sure to also check out my sample pictures under the videos to see just how good it is. (Click on the images for a larger view.)

Video:

Please note that due to YouTube 10 minute video limit I had to break this 12 minute discussion into two parts. (Be sure to watch both videos!)

Video 1

Video 2

Example Pictures:

This image illustrates the huge dynamic range possible with TX and Diafine. In this example TX was rated at 1600, 35mm. (Check out that shadow detail!)

TX1600_DynamicRangeExample

This example is TX at 1600 in low flat lighting…the full print size is 16″x24″ and the crop is a 4″x6″ section out of the full image area. Film size: 35mm

This example and the close up represent TX at 1600. The final image size (print) is 16″x24″ and the crop represents a 3″x3″ area of the final image at full size. Remember…this is TX at 1600 in 35mm!!

EveCropAt1600TX35mm16_24print

Processing Information for Tested Films:

Fuji Acros 100 EI 200 70-75 5+5 (Best choice for really big enlargements and where an EI of 200 is ok.)

FP4 EI 200-250 70-75 3+3 (Very nice but I prefer PMK for FP4).
TMY-2 EI 500-640 70-75 3+3 (Very nice combo but I’d stick with Xtol or D76 1:1…see my review of this film here on the Figital Revolution.)

TX EI 1250-1600 70-75 3+3 (My personal favorite and my new everyday film. I also keep an ND filter with me (.9) for the bright afternoon light and just remove it as the day ends so I can shoot this film all day long on my M7 with no worries!)

All chemicals are mixed with distilled water. Processing is done by hand with stainless steel tanks and reels.

I will be posting Part 2 in a few days which will cover my scanning techniques (specific and general) as well as basic file handling. Part 3 (next week) will focus on the final print and have a demo (yes another video) on hand coating your own paper for inkjet. Stay Tuned!!

For a quick audioblog on my printing techniques and my thoughts on tonality just click on this link: A Fear of Gray

All images and video Copyright Stephen M. Schaub 2008

The New Kodak TMAX 400 (TMY-2) – Pushed to 1600, Processed in XTOL!

New Tmax 400 Box

As promised here is a sample image (my wife Eve Ogden Schaub of Life=Art) in Puerto Rico pushing the new TMY-2 (Tmax 400) to an E.I. of 1600 and processed in Xtol Straight using Kodak’s suggested time/ temp . The light was very, very low as even at an E.I. of 1600 my exposure was still 1/8 at F1.4 (hand-held.) The image was made with a Leica M7 with a 50mm Summilux.

So what are my thoughts????

EveFull_1600EveDetail_1_1600EveDetail_2_1600

Please note: click on the thumbnails for a larger view.

1. Of course there is more grain than the 400 speed test I posted a few days ago (click here) but not a lot considering this is a 2 stop push! It is not as crisp and lacks some fine image detail as the other test image had due to the increased grain and I am sure the slow shutter speed and the f1.4 working f stop ( I do the best I can, but on 10 shots of espresso a day what do you expect?)

2. Good shadow detail and the highlights still have nice separation especially considering the light source.

3. Easy to scan- no problems with excessive contrast or anything…the scan was as easy as my last test scan. (Scanned on an Imacon Scanner at 3200 dpi, 16 Bit, wet mount, no sharpening.)

So what does this mean??? Where do we (I) go from here?

Well I for one will shoot this film as my NEW primary film at box speed (400) – but it is nice to know that in a pinch I can push this film to meet my needs no matter what they are… I am going to continue my exploration of different developers (stay tuned!!) for this film, but for now- Xtol works fine. Once again in my opinion – Kudos to Kodak! (It’s been a long while since I’ve been able to say that twice in one week!)

Image Copyright Stephen M. Schaub 2008