
 In this audiobog I advocate the concept of printing from memory…not just real images captured on film or with digital devices but experiences and subjects that were captured as mental photographs for the purposes of making fuller, more expressive prints. Give a listen!
Uncategorized
Unplugging Your Paper
I spend a lot of time testing and re-testing my materials so that when I need to make a print I can make it perfect the first time. One of the biggest difficulties with printing on uncoated papers is the paper getting plugged up (this a huge problem with the introduction in many new printers of 9+ inks…that’s a whole lot of fluid!) The solution can be simple (note: its not Pepto Bismol) so give this audioblog a listen!
Below: Hariku Example and Link to Test Target!!


Processing Color Film in Diafine Developer
 I’ve read mixed reviews about this concept online so I decided I needed to try it myself. I chose Ilford XP2 Super and Kodak BW400CN, both in 35mm as test films. My results were mixed…the Ilford out-performed in my opinion the Kodak (with regards to tonal range as the Kodak was much harsher) but was anything gained over say TX or 125PX in Diafine?…you be the judge. I will say that the look of a print made using this technique is different and in some cases could be used in a very creative way. The test image was shot with a LOMO LCA+ with the Ilford XP2 Super rated at EI 200. Be sure to click on both images to see them at a larger size.
Tech Notes:
- EI Range for full expressive negatives: 100 – 200
- Diafine Developer at 80F!!!!
- Part A for 5 Minutes with two inversions at the start of each minute.
- Part B for 5 Minutes with two inversions at the start of each minute.
- Wash for 2 Minutes
- Fix: 5 Minutes or package suggestion.
- Wash 5 Minutes
- Perma Wash: 2 Minutes or package suggestion.
- Final Wash, LFN and Dry!
 I have also found that these negatives scan really nicely using most generic gray scanner profiles and the grain is there but acceptable for a process such as this. Give it a try!

Viva la Revolution!!!!
Final Note: The LOMO LCA+ is a Zone Focus camera and as such comparing the sharpness to say a Leica is a real mismatch…but the LOMO has an amazing quality all its own!
Why Take Notes?- Exposure Data Sheets & More!

New Testing Results for InkAid and Film Processing!
The following updates are based on additional testing conducted by me at Indian Hill Imageworks. If your current method works fine for your needs then no worries… otherwise give these “refinements” a try.
Viva la Revolution-
Stephen Schaub
1. Handcoating your own papers with Inkaid- How many coats?: 2+ (12-24 hrs air dry between coats is best). Also be sure to really mix your InkAid…I use a paint mixer which can be found at most good hardware stores attached to a power drill at low speeds- it works great and costs under $10 bucks!
2. Diafine Developer “UNIVERSAL TIME/ AGITATION PROCEDURE”:
- 4.5 Minutes in A and B with 2 gentle inversions at: Start, 1.5 minutes, 3 minutes and again at 4 minutes…dump at end (4.5 minutes and then do the same 4.5 minutes with B.) This increased standing time produces some fantastic negatives!
- NO PRE WET
- Developer Temp between 70-75 F (temp does not affect the developer but temp does affect the film’s emulsion…big difference between film at 68F and film at 80F!
- All films tested here on FR for the purposes of scanning can be processed using this “UNIVERSAL TIME/ AGITATION PROCEDURE” for scanning purposes. Just as a note, I only use metal reels and tanks.
3. 320 TXP and 400 TX are DIFFERENT FILMS (yes I know this is obvious but…)
- EI Range for 320 TXP (120mm)…EI 320
- EI Range for 400 TX (35mm and 120mm)…EI 400-1600 (800-1250 best)
4. Fuji Acros EI 160 using UNIVERSAL DIAFINE TIME… my new favorite film/ developer combo!
Final Note: The “UNIVERSAL TIME/ AGITATION PROCEDURE” has been tested for scanning purposes only.
When Sharp is REALLY Sharp: High Resolution Films, Part 1
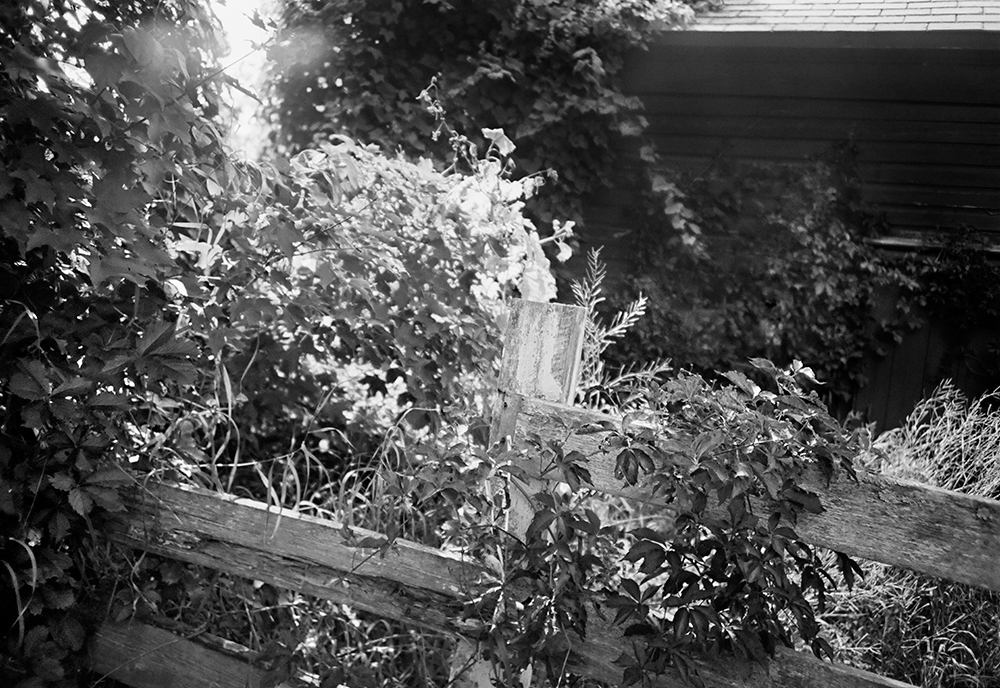
I’ve been testing a new film recently, Rollei Pan 25 (120mm) processed in Diafine (3+3) and the initial results are quite amazing! The film does have a bit of a nasty curl to it when dry but nothing a glass carrier or oil mounting for scanning won’t fix… Here is a sample image I made using this film (shot on a 1960 Rollei TLR “F” at f/11 at 1/8th, exposed at BOX speed 25!) as well as two detail crops…just click on the thumbs to get an enlargement.
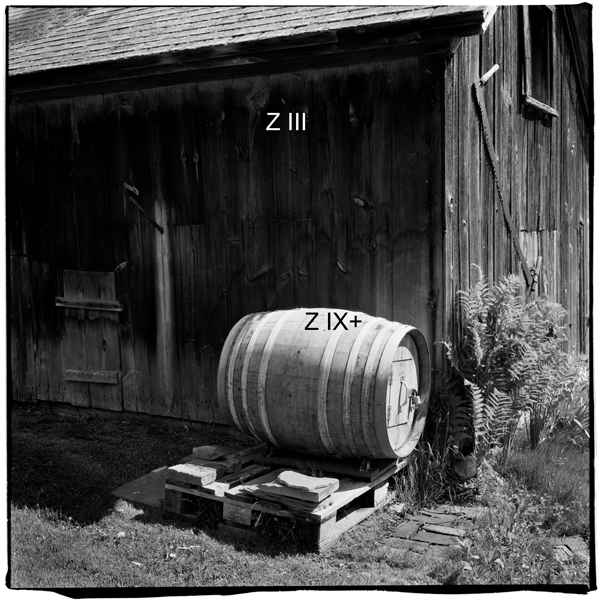
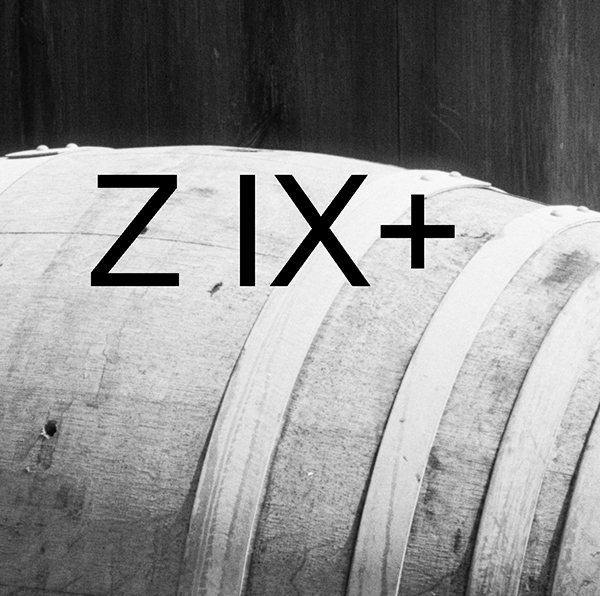
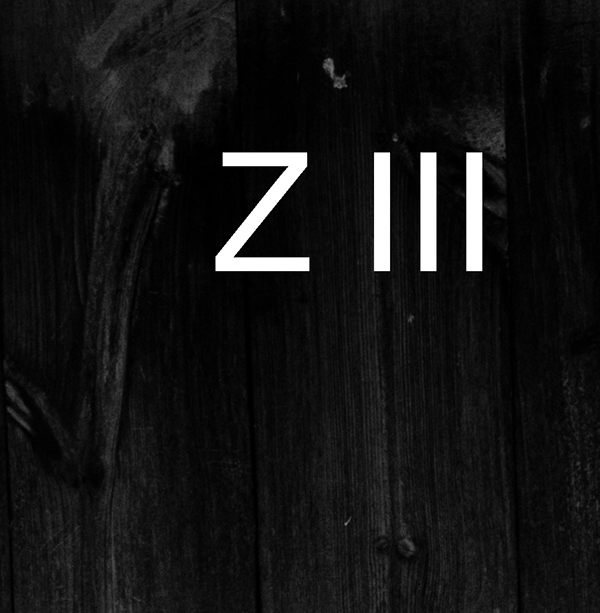
Note: Z= Zone. Also, the usable dynamic of this film is huge…I have great shadow detail down into Zone II (easily) and the highlights are very clean with nothing blocking up and the grain is almost impossible to find!
The final full size image is 20.7″ x 20.7″ at 360dpi (optical scan resolution 3200, 16Bit). It is important to note that NO SHARPENING was applied in scanning or in post processing and NO NOISE REDUCTION has been applied either…the file is au naturale! I will continue to refine this film/ process over the next few days followed by testing of Efke 25 and then a final comparison between Rollei Pan25, Efke 25 and Kodak Technical Pan Film (I have quite a bit of frozen Tech Pan). All images and tests will be shot on 120mm film. Stay tuned!!
Viva la Revolution!!
What is YOUR Usable EI – Exposure Index?
First a quick bit of background info:
Exposure Index- “EI”- is your personal speed setting for a particular film and developer combo that in most cases is different than the manufacturers posted ISO or ASA data (lots of reasons for this difference) and it reflects a photographer’s specific film requirements with regards to shadow and highlight detail, contrast, grain, etc… Many photographers do extensive testing to determine the best EI for a particular film and developer combo but in the end most photographers settle for a single EI and developer time for a particular film. An example would be- “I shoot Kodak TX at an EI of 1250 and process in Diafine 3+3 at 70F.”
Now for the Diafine Twist:
That tested EI is not the “only perfect EI” but rather just one possible working EI when using Diafine Developer. For example, I have determined that TX processed in Diafine at 3+3 has a USABLE EI range of 400-1250/ 1600…that means that I can rate it at 400 or I can rate it at 1250 if I need to or I can rate it at any in between EI based on subject exposure requirements- there is enough latitude with regards to exposure and development with TX and Diafine that both of these EI are possible for scanning purposes and produce brillant negatives…even one shot right after another on the same roll at a different EI, each would get the same processing time in Diafine– it is like working with the very forgiving Ilford XP2 Super which can handle a range from EI 100-800 (C-41 film) but with real B&W film! (Note: I love XP2 Super but it is a very different looking beast than conventional B&W film.) With a “normal” developer, say D-76, you would need to increase or decrease your development time or temp or both if you changed your EI beyond half a stop with most black and white films.
So here are a few films I use with their USABLE EI range based on my testing. (NOTE: all USABLE EI listed are for Diafine Processing as outlined here on Figital Revolution.)
- TX: 400-1250/ 1600 (3+3 at 70F)
- 125PX: 125-400 (3+3 at 70F)
- Fuji Acros: 100-200 (4.5 + 4.5 at 70F)
- TMY-2: 400-640 (3+3 at 70F)
- FP4+: 100-225 (3+3 at 70F)
Final Thought…why would you want to have a different EI for the same film or know the EI range for a particular film? The answer is flexability (how much can I over or under expose and still get a good negative)- with this approach and knowledge let’s say, for example, I am working with a film like Kodak TX-just load a roll in the morning and start shooting and adjust your USABLE or “flexible” EI as the day and lighting change… when you’re done just process the whole roll with your normal Diafine processing time and scan away! The results are consistantly USABLE and amazing.
28mm Zone Plate meets the M7 and Diafine Developer
 Some years ago I did extensive work with pinholes, Zone plates and Holga camera systems, specifically for my Through A Glass Darkly artworks and book. Recently I decided to give a Zone Plate a try on my Leica M7 (it is a 28mm f/32 Zone Plate I purchased from Pinhole Resources) and TX processed as I have already outlined here on the Figital Revolution using Diafine Developer. It seems to me that this combo of TX/ Diafine/ Zone Plate and Leica M are a perfect combo. The TX and Diafine Developer really help control the Zone Plate with regards to contrast and it also gives me a high enough EI to make hand held shots very possible (my usable range for TX in Diafine is 400-1600). The M7, or really any rangefinder camera system is nice as the image view is not reduced (illumination) by looking through the Zone Plate as would be the case with an SLR (of course this means that you will have to visualize your final image as none of the Zone Plate qualities will be visible until you process your film assuming you’re using a film rangefinder). Of course digital capture would give you instant feed back (did this a few years ago in the American Southwest) but I just love the look of this combo. Scans were done in house at Indian Hill Imageworks on our Imacon Scanner, wet mount at 3200 optical dpi- a few resulting images are below from my first roll…

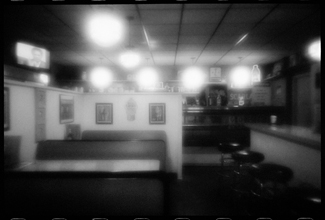
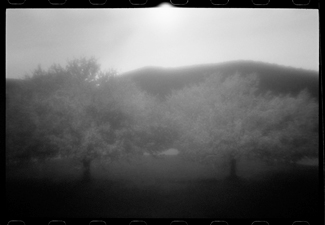
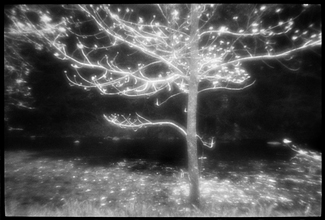
For more information on using a Zone Plate or for that matter what is a Zone Plate check out the links below.
Viva la Revolution!
OCP – Obsessive Compulsive Photographer
Every photographer I know is at least a bit OCD…that is to say we worry and test our materials far more than any other art form- and perhaps even far more than we really need to. This audio blog attempts to provide a bit of breather room and hopefully some ideas on how to control your OCP (obsessive complusive photographic disorder) before it is too late!
TSA and Photography
Security at US airports has never been tighter… so how does that affect traveling photographers? ALOT! This quick audio blog gives a few important tips on how to navigate today’s security when traveling with your photographic equipment.
