Here is an interesting side by side… shot within a few minutes of each other. The BW400CN is an EI of 200 (this film in my Caffenol C process has a very usable EI range from 50-800). The Fuji Acros is an EI of 100 (box speed… depending on processing time the Acros has a usable EI from 50-800). Both can go further in either direction but this range is the real sweet spot. The crops represent a 4″ x 4″ from a 20″ x 20″ image size… yes the BW400CN has more grain but it is much sharper and I am not sure the grain would even print at the 20″ x 20″ size. Both films have fantastic reciprocity characteristics with no adjustment required until 120 sec.
When you hover over the image it will give the description of the thumbnail.
I just finished tweaking the Acros in Caffenol C and yes an EI of 1600 is very possible, as the sample image below shows… 3200 is just a tad past my liking but for some shots it would be usable. Click on both images to see a larger view.
The dark barn boards above the windows were placed at Zone 3… they were EV 0. The detail outside the window fell on Zone 14. The detail image below is a 3″ x 3″ crop from a 20″ x 20″ print… pretty impressive.
My metering technique for these images is a stripped-down Zone approach that will be outlined in some detail in my next book The Photographers Coffee Break … I feel it fits the Caffenol C process quite well.
The image below is a 4″ x 4″ crop from a 20″ x 20″ file of Fuji Acros processed in my tweaked Caffenol C at EI 800!
The best range for the Acros in Caffenol C is around EI 100 – 400 but it is nice to know that 800 and beyond is also possible with nice grain and tonality.
This is really amazing… with my final tweak the Caffenol C process is giving me Fuji Acros with a usable EI from 25-800… I suspect that 1200 would also be fine… this is all with the same processing time / technique. The scan was a s straight scan with no sharpening and each image was just set for proper contrast in PS… wow!
Wait till you see the TMAX 100… I’ll post it tomorrow, it is equally amazing.
5″ crop from a 30″ print… do you see my dirty windows?
Crop from a 30″ print… do you see the screen?
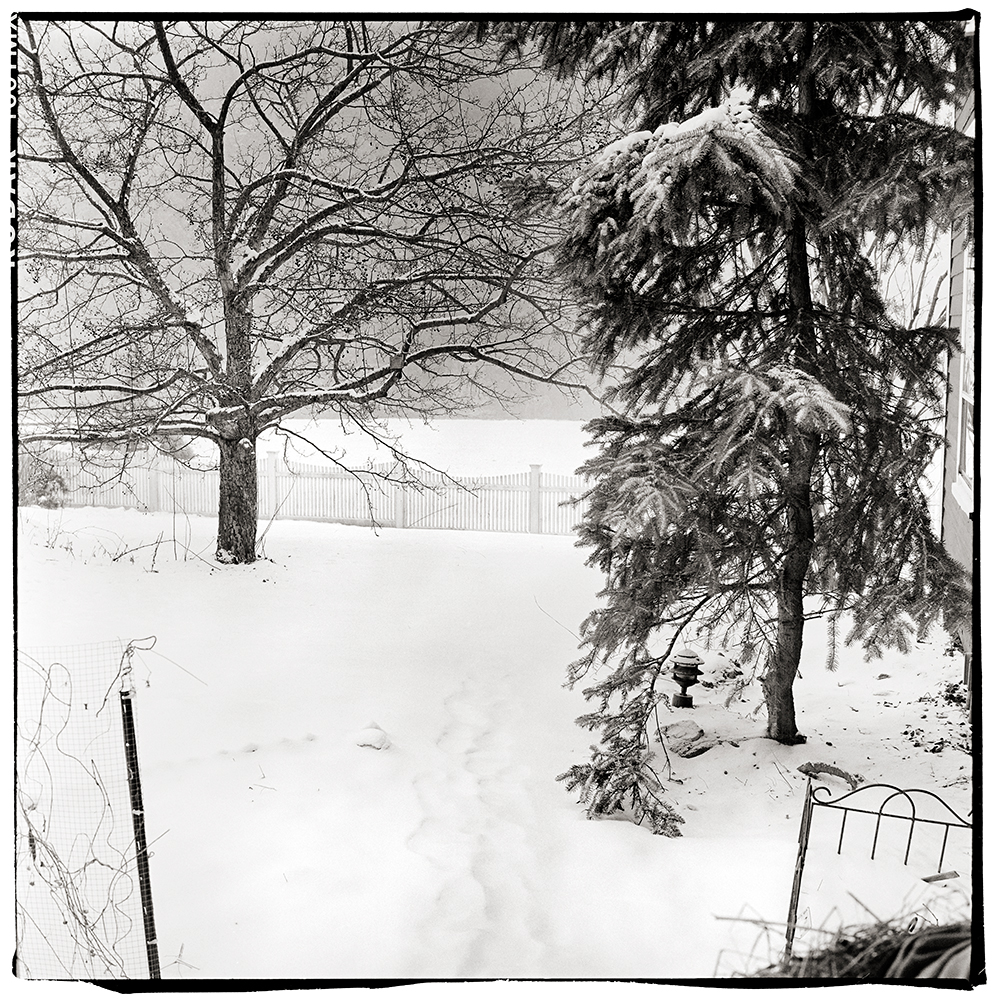
“Normal” Scene.
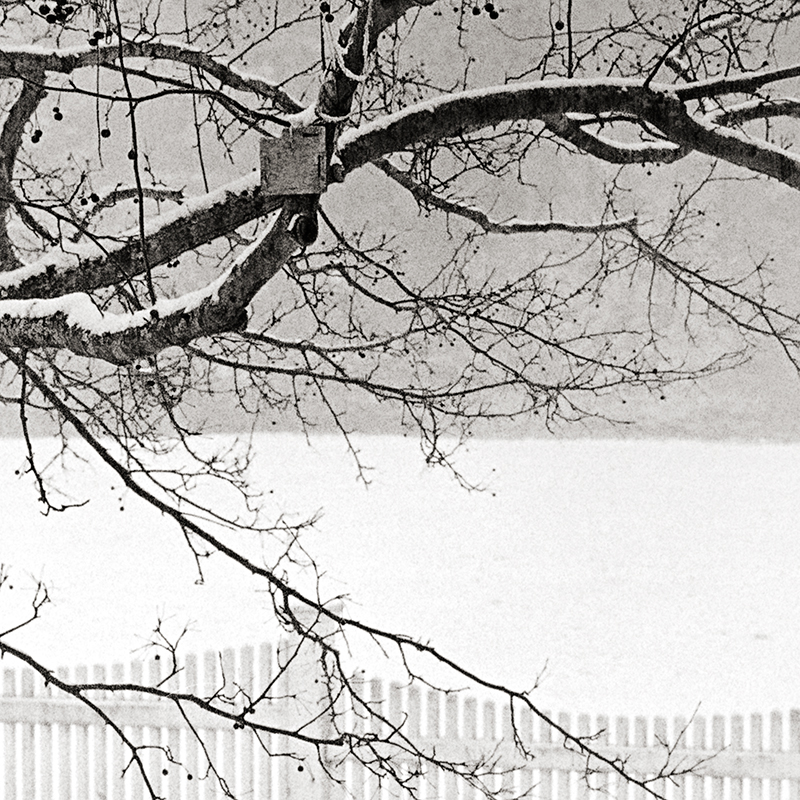
5″ crop from a 30″ print… yes, it is snowing in the image.
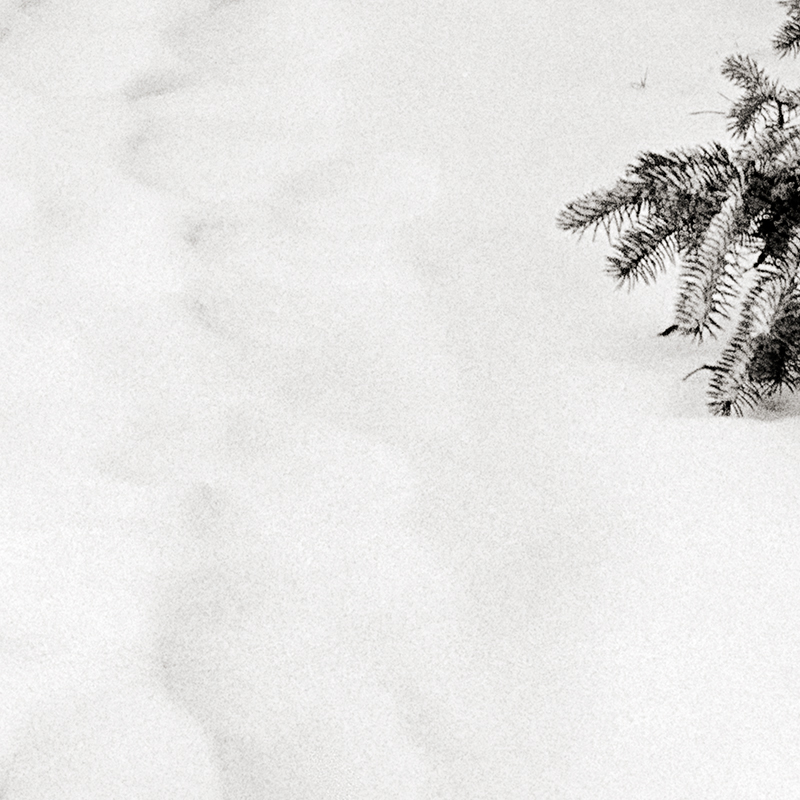
5″ detail crop of a 30″ print… look at the texture in the snow… Zone 8!
Few notes:
Both test images were shot on Kodak TMAX 100 at box speed.
The first test scene was very extreme… Zone 3 on the lower cabinets and the outside snow was Zone 14. The detail images are amazing and I really like how the grain is rendered.
In the second test scene I chose something that had a more “normal” range… deep shadows on the far right bush are Zone 3 and the lightest snow fell on a solid Zone 8… it was snowing during the test shots which is normal for Vermont this time of year, you can see the texture the falling snow makes in the background… the range is quite impressive and very easy to work with.
Both scans were straight scans (Imacon) with no sharpening and no noise reduction applied. In Photoshop my standard contrast adjustments were made with little to no effort. In both cases I had more than enough shadow information and a simple “S” curve did the trick… much like I would do with Diafine processed negatives.
When I compare these negative to the Fuji Acros negatives I find the Acros is a bit softer and the highlights tend to get very dense whereas the Kodak Tmax 100 negatives are a bit thinner looking but have full shadow detail and very controlled highlight density. The grain on the Tmax 100 in my opinion is a bit sharper than the Acros but both look really nice.
Both test images were shot on my 1960 Rollei TLR “F” (120). The first test image was at F5.6 at 1/4 sec and the second image was F11 at 1/30th.
How’s that for a great way to start the New Year!
Caffenol C Note:
I am working on a new book which will outline the technique I use for processing with Caffenol C and also give a starting direction for scanning and Photoshop adjustments to these negatives. I hope to finish sometime this winter so stay tuned.
The sample images below are my second set of test shots processed using Caffenol C… the first image is Ilford FP4+ and the second is Fuji Acros… the Acros in my opinion is quite amazing! The Acros has the lowest fog level of any film I have tested so far (8 films and counting in Caffenol) and has a good usable range and very nice fine grain. The FP4+ was processed using the time posted on Digital Truth with very good success.
Ilford FP4+ Processed in Caffenol CFuji Acros Processed in Caffenol C
I’m not sure if it reads on the screen but in the Acros image there is very good detail in the left side dark region… both images were shot with my Leica MP with a 28mm lens at box speed. The Acros processing time and technique will be discussed later…
Viva la Revolution
Click on the audio logo to listen to this 10 minute discussion on my favorite films both black and white and color and which developer combo I use at Indian Hill Imageworks for the vast majority of my artworks.
Click on the Audio Blog Logo to listen to this 4 minute audio by Stephen Schaub.
Below is a perfect example of old plus new… the new Lomo Fuji Instax Mini back, which is designed to fit the new Lomo Diana F+ (nice but a bit too sharp for my taste)… but with a bit of work (about 2 hours) it fits the vintage Diana Camera and Diana clone cameras perfectly and has a resulting look and feel that is amazing!!… more on that soon.
Notice nice fit... NO TAPE NEEDED!Now Thats a Thing of Beauty!Perfect fit on the bottom with no light leaks!Diner. Exposure 1 second hand-held. Scan from Instax Positive.
Click on the Audio Blog logo to listen to a 4 minute introduction on Instant Photography (Polaroid and Fuji instant films) and the hybrid workflow. This post is an introduction to the upcoming multi part video series here on Figital Revolution so stay tuned.
Plus- stay tuned for my newest artworks made using instant materials to released later this fall. The show at Indian Hill Imageworks is tentatively scheduled to open on October 3, 2009… more information on that soon as well!
Viva la Revolution- Stephen
Ok, so lets put everything together and start processing some film. First, be sure to listen/ watch Part 1 and Part 2 prior to this post as there is important information in those posts not covered here. Then click on the Audio Blog Logo to hear an 11 minute summary of tests- what worked and what didn’t- and my thoughts on successful stand development.
Recipes described in the Audio Portion of this post:
Fuji Acros (EI 100 / 125)
800 ML Distilled Water
3 ML R09
200 ML Xtol Developer
1/4 Teaspoon Borax (optional but helps control fog)
1-2 Teaspoons Asorbic Acid (optional)
Process as described for 3 Hours. You can cut this in half for smaller tanks.
Kodak TMY-2 TMAX 400
800 ML Distilled Water
5 ML R09
200 ML Xtol Developer
1/4 Teaspoon Borax (optional but helps control fog)
1-2 Teaspoons Asorbic Acid (optional)
Process as described for 1 – 1.5 hours. You can cut this in half for smaller tanks.
You can use the recipes above for many films… I’d suggest the TMY-2 Reciepe for 2 hours with films such as TX, Delta 100, Delta 400 and HP5… do a test at 2 hours and then one at 3 hours to see what works best for you!
Source for additional Information and example images (good book to buy!):