Rollei Retro 100 Film Processed in Diafine Developer

Yet another Diafine Developer Test! I’ve been wanting to try this film for some time now and was able to fit a test into my schedule this week so here are the results and my thoughts.

First my Thoughts:

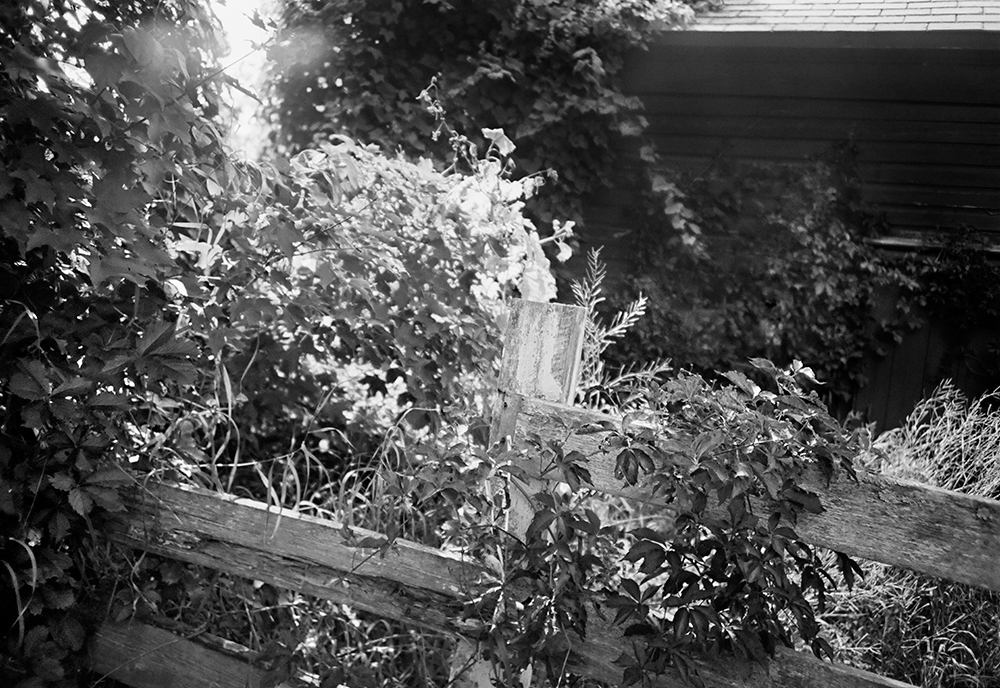
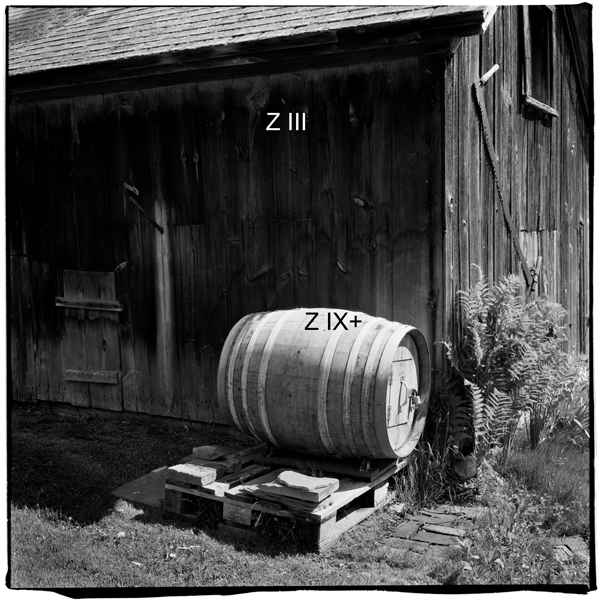
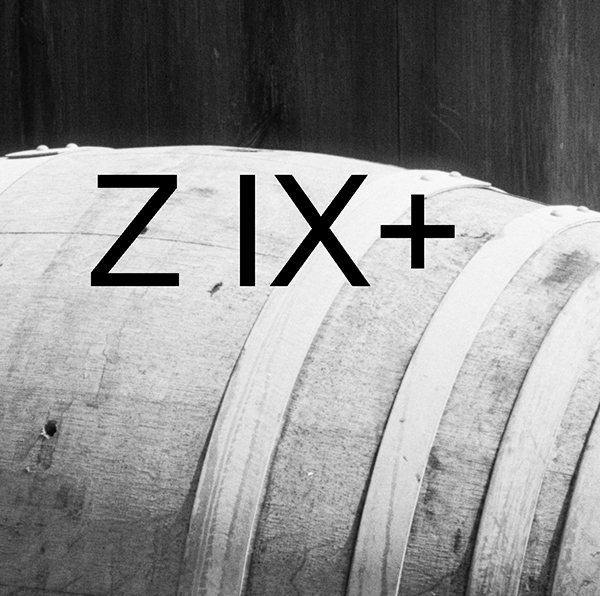
Rollei Retro 100 is a nice film with good classic grain structure and good tonality…photographers who like classic grain and film with a bit of punch will love it with Diafine. The film has a usable EI from around 50-200 (in Diafine) but I found that at 100 I got the best shadows and midtone separation and it gave me a bit of margin for meter error. The highlights are clean, bright and open even in the brightest areas.

For photographers who want that classic street photographer look this would be a good choice…however, if you were raised on Fuji Acros for breakfast and TMAX for dinner and love those films this probably won’t be your cup of tea.

The Results:

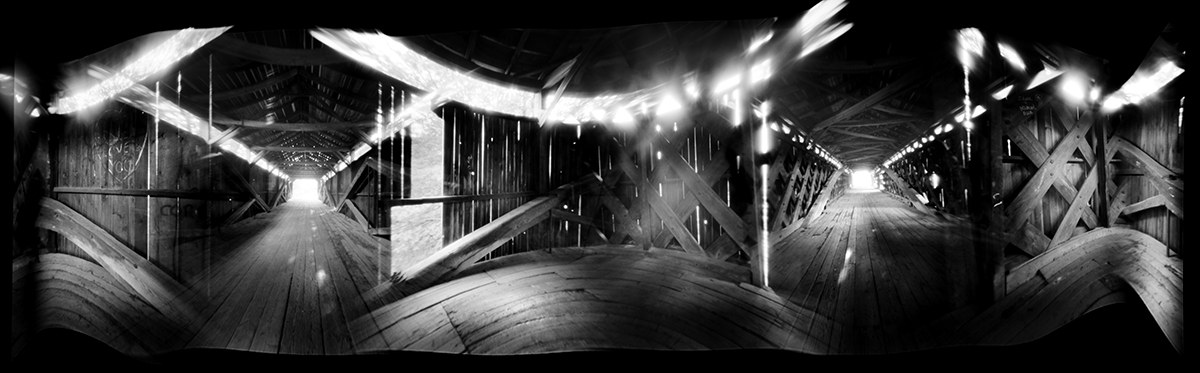
Both images were made using a Leica M7 with a 50mm Summilux Lens at F5.6 – in camera meter at an  EI of 100. Scans were done on an Imacon Scanner at 3150 dpi, no sharpening or noise reduction was applied to either file. File prep/ workflow in Photoshop CS3 is my standard for all Diafine developed test negatives which is to apply just a bit of an “S” curve and make sure my white and black points are fine.

The sharpness of the film is good but again not like TMAX 100 or the New TMAX 400. But I do like the film alot! It won’t be my first go to film for general shooting but it is something that has a unique look and has found a place in my film bag.

PDF with more Rollei Retro Information.

Processing Technique, Diafine Developer and Rollei Retro Film:

  • 4 Minutes Part A, 75F – 2 inversions every minute.
  • 4 Minutes Part B, 75F – 2 inversions every minute.
  • Wash 30 Seconds
  • Fix 5 Minutes
  • Wash 30 Seconds
  • Perma Wash 1 Minute
  • Wash 10 Minutes
  • LFN
  • Dry

Final note: There has been conversation (gossip) on the web that Rollei Retro 100 is AGFA APX 100 or something very similar…as I don’t have any AGFA APX 100 to test I can neither confirm nor deny this BUT even if it is just a slightly tweaked version of APX – as AFGA is no longer in business- it is nice to have a “similar” film still being made.

Viva la Revolution!!!

___________

UPDATE 9.13.2008:

Link to a conversation on Flickr where information on the maker of Rollei Retro (old AGFA) can be found as well as exciting information on the NEW film release set to replace this film as of Photokina 2008:

LINK TO ARTICLE/ DISCUSSION

Processing Color Film in Diafine Developer

I’ve read mixed reviews about this concept online so I decided I needed to try it myself. I chose Ilford XP2 Super and Kodak BW400CN, both in 35mm as test films. My results were mixed…the Ilford out-performed in my opinion the Kodak (with regards to tonal range as the Kodak was much harsher) but was anything gained over say TX or 125PX in Diafine?…you be the judge. I will say that the look of a print made using this technique is different and in some cases could be used in a very creative way. The test image was shot with a LOMO LCA+ with the Ilford XP2 Super rated at EI 200. Be sure to click on both images to see them at a larger size.

Tech Notes:

  • EI Range for full expressive negatives: 100 – 200
  • Diafine Developer at 80F!!!!
  • Part A for 5 Minutes with two inversions at the start of each minute.
  • Part B for 5 Minutes with two inversions at the start of each minute.
  • Wash for 2 Minutes
  • Fix: 5 Minutes or package suggestion.
  • Wash 5 Minutes
  • Perma Wash: 2 Minutes or package suggestion.
  • Final Wash, LFN and Dry!

I have also found that these negatives scan really nicely using most generic gray scanner profiles and the grain is there but acceptable for a process such as this. Give it a try!

Viva la Revolution!!!!

Final Note: The LOMO LCA+ is a Zone Focus camera and as such comparing the sharpness to say a Leica is a real mismatch…but the LOMO has an amazing quality all its own!

Scott Bridge, The Hexomniscope and Diafine Developer

Scott Bridge from the Vanishing Vermont Series.

I’ve written extensively on this web site about the qualities of Diafine Developer and different Black and White films for the purposes of scanning. Here is an example of Fuji Acros 100 (EI 160, 120MM) shot with my Hexomniscope Pinhole Camera by Abelson Scope Works and processed in Diafine Developer….did I mention that the exposure was F205 at 37 Minutes?! The final print size is 28″ x 90″ and is printing as I type!

Viva la Revolution

Pocohontas Meets Matt Abelson and Stephen Schaub

Pocohontas Meets Matt Abelson and Stephen Schaub, Brattleboro, VT. 2008

Listen to this exciting interview with Matt Abelson of Abelson Scope Works as he talks about his Pinhole Camera Systems(Hexomniscope, Omniscope and Pinhole Turret). Interview by Stephen Schaub.

Note: The Omniscope is in Matt’s hands (left) and the Hexomniscope is in my hands (right)…Pocohontas is just along for the ride.  Also, as mentioned in the audio blog please post questions to Matt Abelson here in the comment section under this post and I will pass it along to Matt so that the questions and answers can accompany this post for the benefit of all.

Viva la Revolution!!

Thoughts on the New Mega-Pixel Monsters

The Mega-Pixel wars are still hot with the introduction of Hasselblad’s new 50MP Digital Back (H3DII-50) and Phase One’s new 60MP Digital Back (P65+)…but, really, who is the market for these new bleeding-edge systems? Does anyone really need 60MP? Can anyone besides my dentist really afford it? Click on the audio logo for more! By Stephen Schaub.

Vanishing Vermont and the Hexomniscope

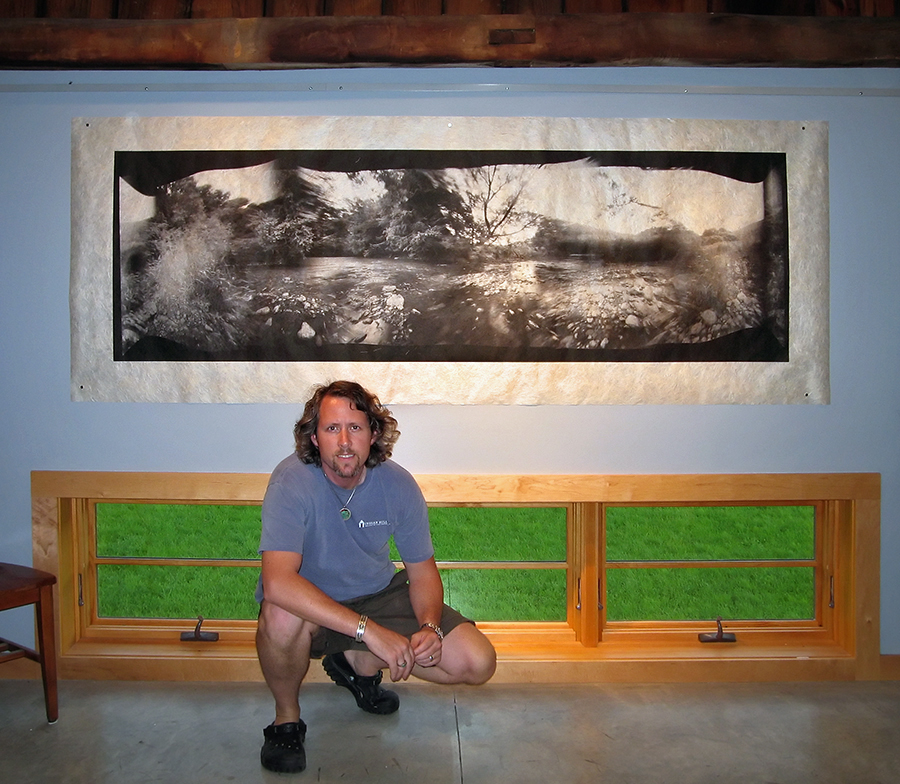
 Exciting news! I have just begun a new project called Vanishing Vermont which, when completed in a year or so, will be a show and book (co-authored with Eve Ogden Schaub) more information as the project develops…

Meanwhile, I have spent the last few months testing different pinhole and zone plate camera systems and have settled on the Hexomniscope by Ableson Scope Works for these new artworks. I’m still in the early stages of working with this new system but the flexibility is amazing (as are the huge 6×17+ cm negatives!) Images are printed on Japanese Kinwashi as a d’Vinci Noir (image size: 28″ x 90″.) The camera is really quite small and weighs in at around 3lb.

I am off to California tomorrow for a bit of shooting (Yes with this camera) so stay tuned for a full report when I return.

In case you are wondering….Film: Fuji Acros processed in Diafine (of course), 360 degree image (6 images), 8 minutes at f/180.

Viva la Revolution!

George Eastman and Kodak for Kids

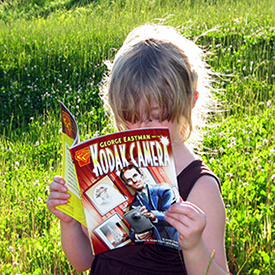
I, like many parents, have a hidden hope that one of my children will someday follow in my footsteps and one day become a photographer… a successful photographer, mind you. My oldest daughter was first introduced to photography when I gave her a Polaroid camera slr 680 (SX-70) at the age of four and then later a lighter new plastic Polaroid Spectra System. She’s now eight and for Christmas received a digital camera from her Uncle Chris and most recently I gave her a 1924 No.2 Kodak Brownie Cartridge Hawk-Eye, Model B from my collection (shoots 120mm, 6×9 cm).

With each new camera comes more questions on photography, art and the general “how do you do that“? Meanwhile, my wife Eve has just returned from a trip to Rochester, NY which included a visit to the George Eastman House – an amazing must pilgrimage for all photographers, whether you like Kodak or not- and purchased a comic book (gotta have a souveneir for the kids!) about George Eastman and the early history of Kodak. I, of course, had to read it (okay, twice) and despite its simplistic narrative it does answer many questions my 8 year old has regarding photography and this “new” Brownie camera she’s received… and it is presented in a manner that is accessable and fun to read. Yes, I know any discussion about Kodak nowadays is fraught with controversy and conflicting opinion but for my daughter it is perfect… and waaay more age appropriate than A World History of Photography by Naomi Rosenblum.

I, for one, would like to let her have her moment of blissful discovery for all things photographic- anger regarding Kodak (not to mention Ilford, Fuji and Agfa (RIP) et al) can come later. You know, like in art school!

Amazon LinK: George Eastman and the Kodak Camera (Inventions and Discovery series)

New Testing Results for InkAid and Film Processing!

The following updates are based on additional testing conducted by me at Indian Hill Imageworks. If your current method works fine for your needs then no worries… otherwise give these “refinements” a try.

Viva la Revolution-
Stephen Schaub

1. Handcoating your own papers with Inkaid- How many coats?: 2+ (12-24 hrs air dry between coats is best). Also be sure to really mix your InkAid…I use a paint mixer which can be found at most good hardware stores attached to a power drill at low speeds- it works great and costs under $10 bucks!

2. Diafine Developer “UNIVERSAL TIME/ AGITATION PROCEDURE”:

  • 4.5 Minutes in A and B with 2 gentle inversions at: Start, 1.5 minutes, 3 minutes and again at 4 minutes…dump at end (4.5 minutes and then do the same 4.5 minutes with B.) This increased standing time produces some fantastic negatives! 
  • NO PRE WET
  • Developer Temp between 70-75 F (temp does not affect the developer but temp does affect the film’s emulsion…big difference between film at 68F and film at 80F!
  • All films tested here on FR for the purposes of scanning can be processed using this “UNIVERSAL TIME/ AGITATION PROCEDURE” for scanning purposes. Just as a note, I only use metal reels and tanks.

3. 320 TXP and 400 TX are DIFFERENT FILMS (yes I know this is obvious but…)

  • EI Range for 320 TXP (120mm)…EI 320
  • EI Range for 400 TX (35mm and 120mm)…EI 400-1600 (800-1250 best)

4. Fuji Acros EI 160 using UNIVERSAL DIAFINE TIME… my new favorite film/ developer combo!

Final Note: The “UNIVERSAL TIME/ AGITATION PROCEDURE” has been tested for scanning purposes only.

The 5 Minute Zone System

This short audioblog (under 5 minutes) will give all photographers who want better control over their exposure when using black and white roll films a quick and easy working solution: The 5 Minute Zone System! This is not your grandfather’s full-bore Zone System but rather a user-friendly method for predictable, repeatable results! Just click on the audio link and give it a listen… Viva la Revolution!!

More info on the FULL-BORE Zone System: Click Here! 

When Sharp is REALLY Sharp: High Resolution Films, Part 1

I’ve been testing a new film recently, Rollei Pan 25 (120mm) processed in Diafine (3+3) and the initial results are quite amazing! The film does have a bit of a nasty curl to it when dry but nothing a glass carrier or oil mounting for scanning won’t fix… Here is a sample image I made using this film (shot on a 1960 Rollei TLR “F” at f/11 at 1/8th, exposed at BOX speed 25!) as well as two detail crops…just click on the thumbs to get an enlargement.

Note: Z= Zone. Also, the usable dynamic of this film is huge…I have great shadow detail down into Zone II (easily) and the highlights are very clean with nothing blocking up and the grain is almost impossible to find!

The final full size image is 20.7″ x 20.7″ at 360dpi (optical scan resolution 3200, 16Bit). It is important to note that NO SHARPENING was applied in scanning or in post processing and NO NOISE REDUCTION has been applied either…the file is au naturale! I will continue to refine this film/ process over the next few days followed by testing of Efke 25 and then a final comparison between Rollei Pan25, Efke 25 and Kodak Technical Pan Film (I have quite a bit of frozen Tech Pan). All images and tests will be shot on 120mm film. Stay tuned!!

Viva la Revolution!!