Is Cross Processing or XPRO Dead?

I’ve just started a film test in preparation for my trip to Italy next month– the two films in consideration are Kodak Ektar 100 and Agfa Precia CT cross processed. Thus far, most of the artworks from my current series A New Eden are either XPRO (cross processed- E6 film in C41 chem) or expired film. However- after much testing here on FR I have recently  fallen in love with the new Kodak Ektar  …SO I decided to do a quick comparison test and find out: does the XPRO effect really have to be actual cross-processed film?

So what do YOU think? Look at the snapshots below and see if you can pick out the one that is the Agfa Precia CT XPRO…only one is true XPRO…the others are all Kodak Ektar  in Photoshop using Alien Skin Exposure 2! 

Think you have the right answer? Then give a listen to the Audio portion of this post for additional thoughts on cross processing / Xpro… as well as the answer!

AudioBlog LogoPlease click on the logo to listen to the audio.


When you finish with part one, click here to listen to part 2!

Olympus XA vs LOMO LCA and LCA Plus

Please watch this video first for a discussion on the pros and cons of the Olympus XA vs the LOMO LCA and LCA+. Please note that the video is of high quality and may take a few seconds to load depending on your connection speed.

Comparison Images:

lca

xaxaschaubprocess

General Info: All test images were shot at F 2.8 on Kodak TX, processed in Diafine Developer, scanned on an Imacon with no sharpening applied, natural light. Please be sure to click on the images to see them larger.

LCA: Notice the general soft focus/ appearance…I shot this image 10 times and this was the sharpest. I changed my lens to subject distance and I changed my zone focus setting but in the end this was the best. It is not real sharp but does have a nice soft visual quality with some subtle vignetting.

XA: Very sharp at the point of focus (glasses)… and this sharpness is at F 2.8!  The XA achieves its best sharpness around F 5.6 – F 8. The OOF (out of focus) quality is nice in the background and general illumination is pretty good edge to edge.

XA+: This is the same negative as the XA sample image above with the addition of a bit of a vignette and a bit of a general surface blur applied in Photoshop…I feel this hits the mark perfectly for my visual needs.

Useful Links:

Olympus XA Info

LOMO LCA Info

Olympus XA Repair/ Service

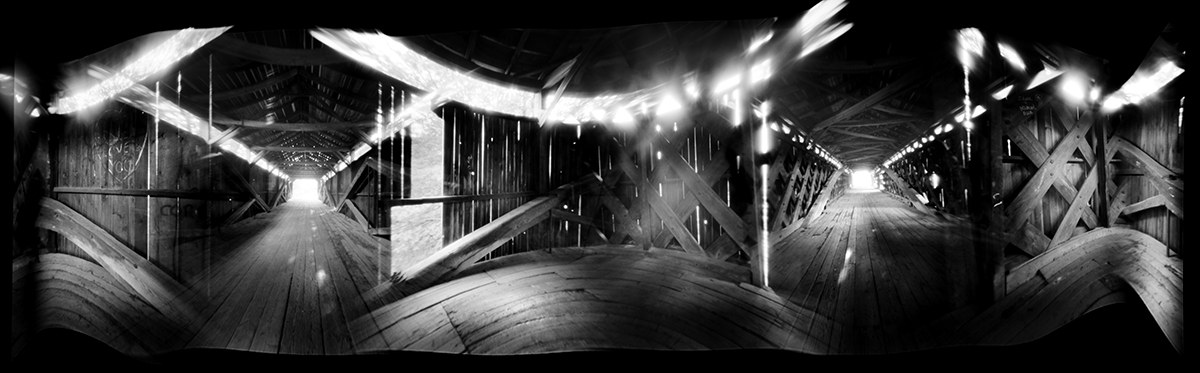
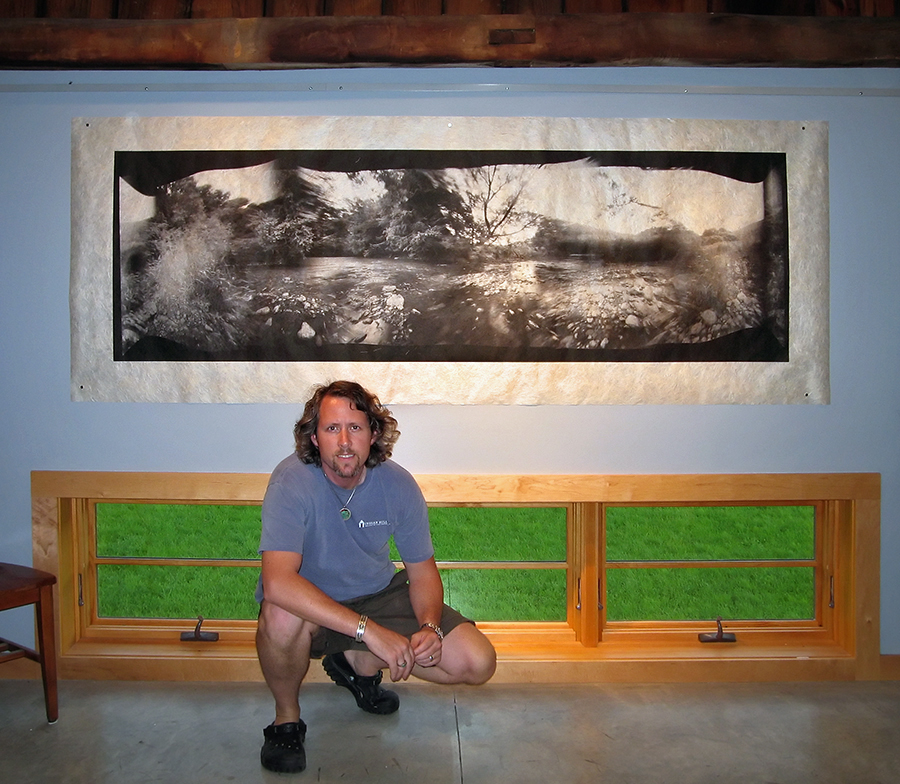
A New Eden – Artworks by yours truly made on the LCA and XA (the new XA artworks can be found on the home page). This overlapping negative technique is possible with both the XA and the LCA and it the subject of a future post here on the Figital Revolution…stay tuned!

Notes: The Olympus XA came in other later versions such as the XA 1, XA 2, XA 3 and the XA 4 all of which are Zone Focus cameras. My favorite and the most collected and used is the original XA followed by the XA 4.

Final Thoughts: I will be posting additional articles regarding the XA with info on fill flash, long bulb exposures and additional tips and techniques in the coming weeks so again stay tuned!

Viva la Revolution- Stephen

UPDATE: I was wrong on the current price of the Lomo LCA+…it is not $199 US as I state in the video but rather $250 US…the XA is now a real bargain!

New Kodak Ektar 100 Film – Part 1

I was lucky enough to get a brick plus (35mm) of the new Kodak Ektar film at Photo Expo Plus in NYC… so when I returned to my studio in Vermont I quickly loaded my Leica M7 with a roll and decided to make a few “test” shots around my yard.

Image Results:

The Full Size image is a 20″ x 30″ print- the crop represents a 4″ x 4″ section of the full size.

Testing Specs:

  • Leica M7 with Leica Summilux 50mm 1.4 Lens
  • F 5.6 at 1/125, Hand-held
  • Film was rated at Box Speed (more on this later…)
  • Scan was done on an Imacon with NO sharpening applied, scanned at 6300 dpi.
  • Photoshop work was limited to white point and black point, no color correction, no noise reduction, no sharpening, no curves…

Image Size/ File Size Info:

  • 309 MB file at 300 Optical DPI, 16 Bit
  • 20″ x 30″ Print Size

Initial Thoughts:

This new offering by Kodak has very tight grain (this is 35mm folks!!) with good, bold color but still “neutral/ natural” in feel. My initial feeling is that it is a bit slower than box speed (normal for most negative material). On my next test roll I will rate it around 50-64 which should be perfect (with color negative material its better to be safe than sorry with regards to your exposure!). Box Speed (ASA 100) is usable, but under difficult lighting situations underexposure is just too great a risk. So far… I am very impressed…stay tuned for Part 2 in a few days.

Viva la Revolution!

Rollei Retro 100 Film Processed in Diafine Developer

Yet another Diafine Developer Test! I’ve been wanting to try this film for some time now and was able to fit a test into my schedule this week so here are the results and my thoughts.

First my Thoughts:

Rollei Retro 100 is a nice film with good classic grain structure and good tonality…photographers who like classic grain and film with a bit of punch will love it with Diafine. The film has a usable EI from around 50-200 (in Diafine) but I found that at 100 I got the best shadows and midtone separation and it gave me a bit of margin for meter error. The highlights are clean, bright and open even in the brightest areas.

For photographers who want that classic street photographer look this would be a good choice…however, if you were raised on Fuji Acros for breakfast and TMAX for dinner and love those films this probably won’t be your cup of tea.

The Results:

Both images were made using a Leica M7 with a 50mm Summilux Lens at F5.6 – in camera meter at an  EI of 100. Scans were done on an Imacon Scanner at 3150 dpi, no sharpening or noise reduction was applied to either file. File prep/ workflow in Photoshop CS3 is my standard for all Diafine developed test negatives which is to apply just a bit of an “S” curve and make sure my white and black points are fine.

The sharpness of the film is good but again not like TMAX 100 or the New TMAX 400. But I do like the film alot! It won’t be my first go to film for general shooting but it is something that has a unique look and has found a place in my film bag.

PDF with more Rollei Retro Information.

Processing Technique, Diafine Developer and Rollei Retro Film:

  • 4 Minutes Part A, 75F – 2 inversions every minute.
  • 4 Minutes Part B, 75F – 2 inversions every minute.
  • Wash 30 Seconds
  • Fix 5 Minutes
  • Wash 30 Seconds
  • Perma Wash 1 Minute
  • Wash 10 Minutes
  • LFN
  • Dry

Final note: There has been conversation (gossip) on the web that Rollei Retro 100 is AGFA APX 100 or something very similar…as I don’t have any AGFA APX 100 to test I can neither confirm nor deny this BUT even if it is just a slightly tweaked version of APX – as AFGA is no longer in business- it is nice to have a “similar” film still being made.

Viva la Revolution!!!

___________

UPDATE 9.13.2008:

Link to a conversation on Flickr where information on the maker of Rollei Retro (old AGFA) can be found as well as exciting information on the NEW film release set to replace this film as of Photokina 2008:

LINK TO ARTICLE/ DISCUSSION

Scott Bridge, The Hexomniscope and Diafine Developer

Scott Bridge from the Vanishing Vermont Series.

I’ve written extensively on this web site about the qualities of Diafine Developer and different Black and White films for the purposes of scanning. Here is an example of Fuji Acros 100 (EI 160, 120MM) shot with my Hexomniscope Pinhole Camera by Abelson Scope Works and processed in Diafine Developer….did I mention that the exposure was F205 at 37 Minutes?! The final print size is 28″ x 90″ and is printing as I type!

Viva la Revolution

Pocohontas Meets Matt Abelson and Stephen Schaub

Pocohontas Meets Matt Abelson and Stephen Schaub, Brattleboro, VT. 2008

Listen to this exciting interview with Matt Abelson of Abelson Scope Works as he talks about his Pinhole Camera Systems(Hexomniscope, Omniscope and Pinhole Turret). Interview by Stephen Schaub.

Note: The Omniscope is in Matt’s hands (left) and the Hexomniscope is in my hands (right)…Pocohontas is just along for the ride.  Also, as mentioned in the audio blog please post questions to Matt Abelson here in the comment section under this post and I will pass it along to Matt so that the questions and answers can accompany this post for the benefit of all.

Viva la Revolution!!

Thoughts on the New Mega-Pixel Monsters

The Mega-Pixel wars are still hot with the introduction of Hasselblad’s new 50MP Digital Back (H3DII-50) and Phase One’s new 60MP Digital Back (P65+)…but, really, who is the market for these new bleeding-edge systems? Does anyone really need 60MP? Can anyone besides my dentist really afford it? Click on the audio logo for more! By Stephen Schaub.

Vanishing Vermont and the Hexomniscope

 Exciting news! I have just begun a new project called Vanishing Vermont which, when completed in a year or so, will be a show and book (co-authored with Eve Ogden Schaub) more information as the project develops…

Meanwhile, I have spent the last few months testing different pinhole and zone plate camera systems and have settled on the Hexomniscope by Ableson Scope Works for these new artworks. I’m still in the early stages of working with this new system but the flexibility is amazing (as are the huge 6×17+ cm negatives!) Images are printed on Japanese Kinwashi as a d’Vinci Noir (image size: 28″ x 90″.) The camera is really quite small and weighs in at around 3lb.

I am off to California tomorrow for a bit of shooting (Yes with this camera) so stay tuned for a full report when I return.

In case you are wondering….Film: Fuji Acros processed in Diafine (of course), 360 degree image (6 images), 8 minutes at f/180.

Viva la Revolution!

New Testing Results for InkAid and Film Processing!

The following updates are based on additional testing conducted by me at Indian Hill Imageworks. If your current method works fine for your needs then no worries… otherwise give these “refinements” a try.

Viva la Revolution-
Stephen Schaub

1. Handcoating your own papers with Inkaid- How many coats?: 2+ (12-24 hrs air dry between coats is best). Also be sure to really mix your InkAid…I use a paint mixer which can be found at most good hardware stores attached to a power drill at low speeds- it works great and costs under $10 bucks!

2. Diafine Developer “UNIVERSAL TIME/ AGITATION PROCEDURE”:

  • 4.5 Minutes in A and B with 2 gentle inversions at: Start, 1.5 minutes, 3 minutes and again at 4 minutes…dump at end (4.5 minutes and then do the same 4.5 minutes with B.) This increased standing time produces some fantastic negatives! 
  • NO PRE WET
  • Developer Temp between 70-75 F (temp does not affect the developer but temp does affect the film’s emulsion…big difference between film at 68F and film at 80F!
  • All films tested here on FR for the purposes of scanning can be processed using this “UNIVERSAL TIME/ AGITATION PROCEDURE” for scanning purposes. Just as a note, I only use metal reels and tanks.

3. 320 TXP and 400 TX are DIFFERENT FILMS (yes I know this is obvious but…)

  • EI Range for 320 TXP (120mm)…EI 320
  • EI Range for 400 TX (35mm and 120mm)…EI 400-1600 (800-1250 best)

4. Fuji Acros EI 160 using UNIVERSAL DIAFINE TIME… my new favorite film/ developer combo!

Final Note: The “UNIVERSAL TIME/ AGITATION PROCEDURE” has been tested for scanning purposes only.

The 5 Minute Zone System

This short audioblog (under 5 minutes) will give all photographers who want better control over their exposure when using black and white roll films a quick and easy working solution: The 5 Minute Zone System! This is not your grandfather’s full-bore Zone System but rather a user-friendly method for predictable, repeatable results! Just click on the audio link and give it a listen… Viva la Revolution!!

More info on the FULL-BORE Zone System: Click Here!