
Click on play button to listen to the review:
Images: click on each to view larger….

Film Data Sheet: Click Here
additional reading: www.martinzimelka.com/pages/Rollei_Retro400s.html
Viva la Revolution- Stephen
Click on play button to listen to the review:
Images: click on each to view larger….
Film Data Sheet: Click Here
additional reading: www.martinzimelka.com/pages/Rollei_Retro400s.html
Viva la Revolution- Stephen
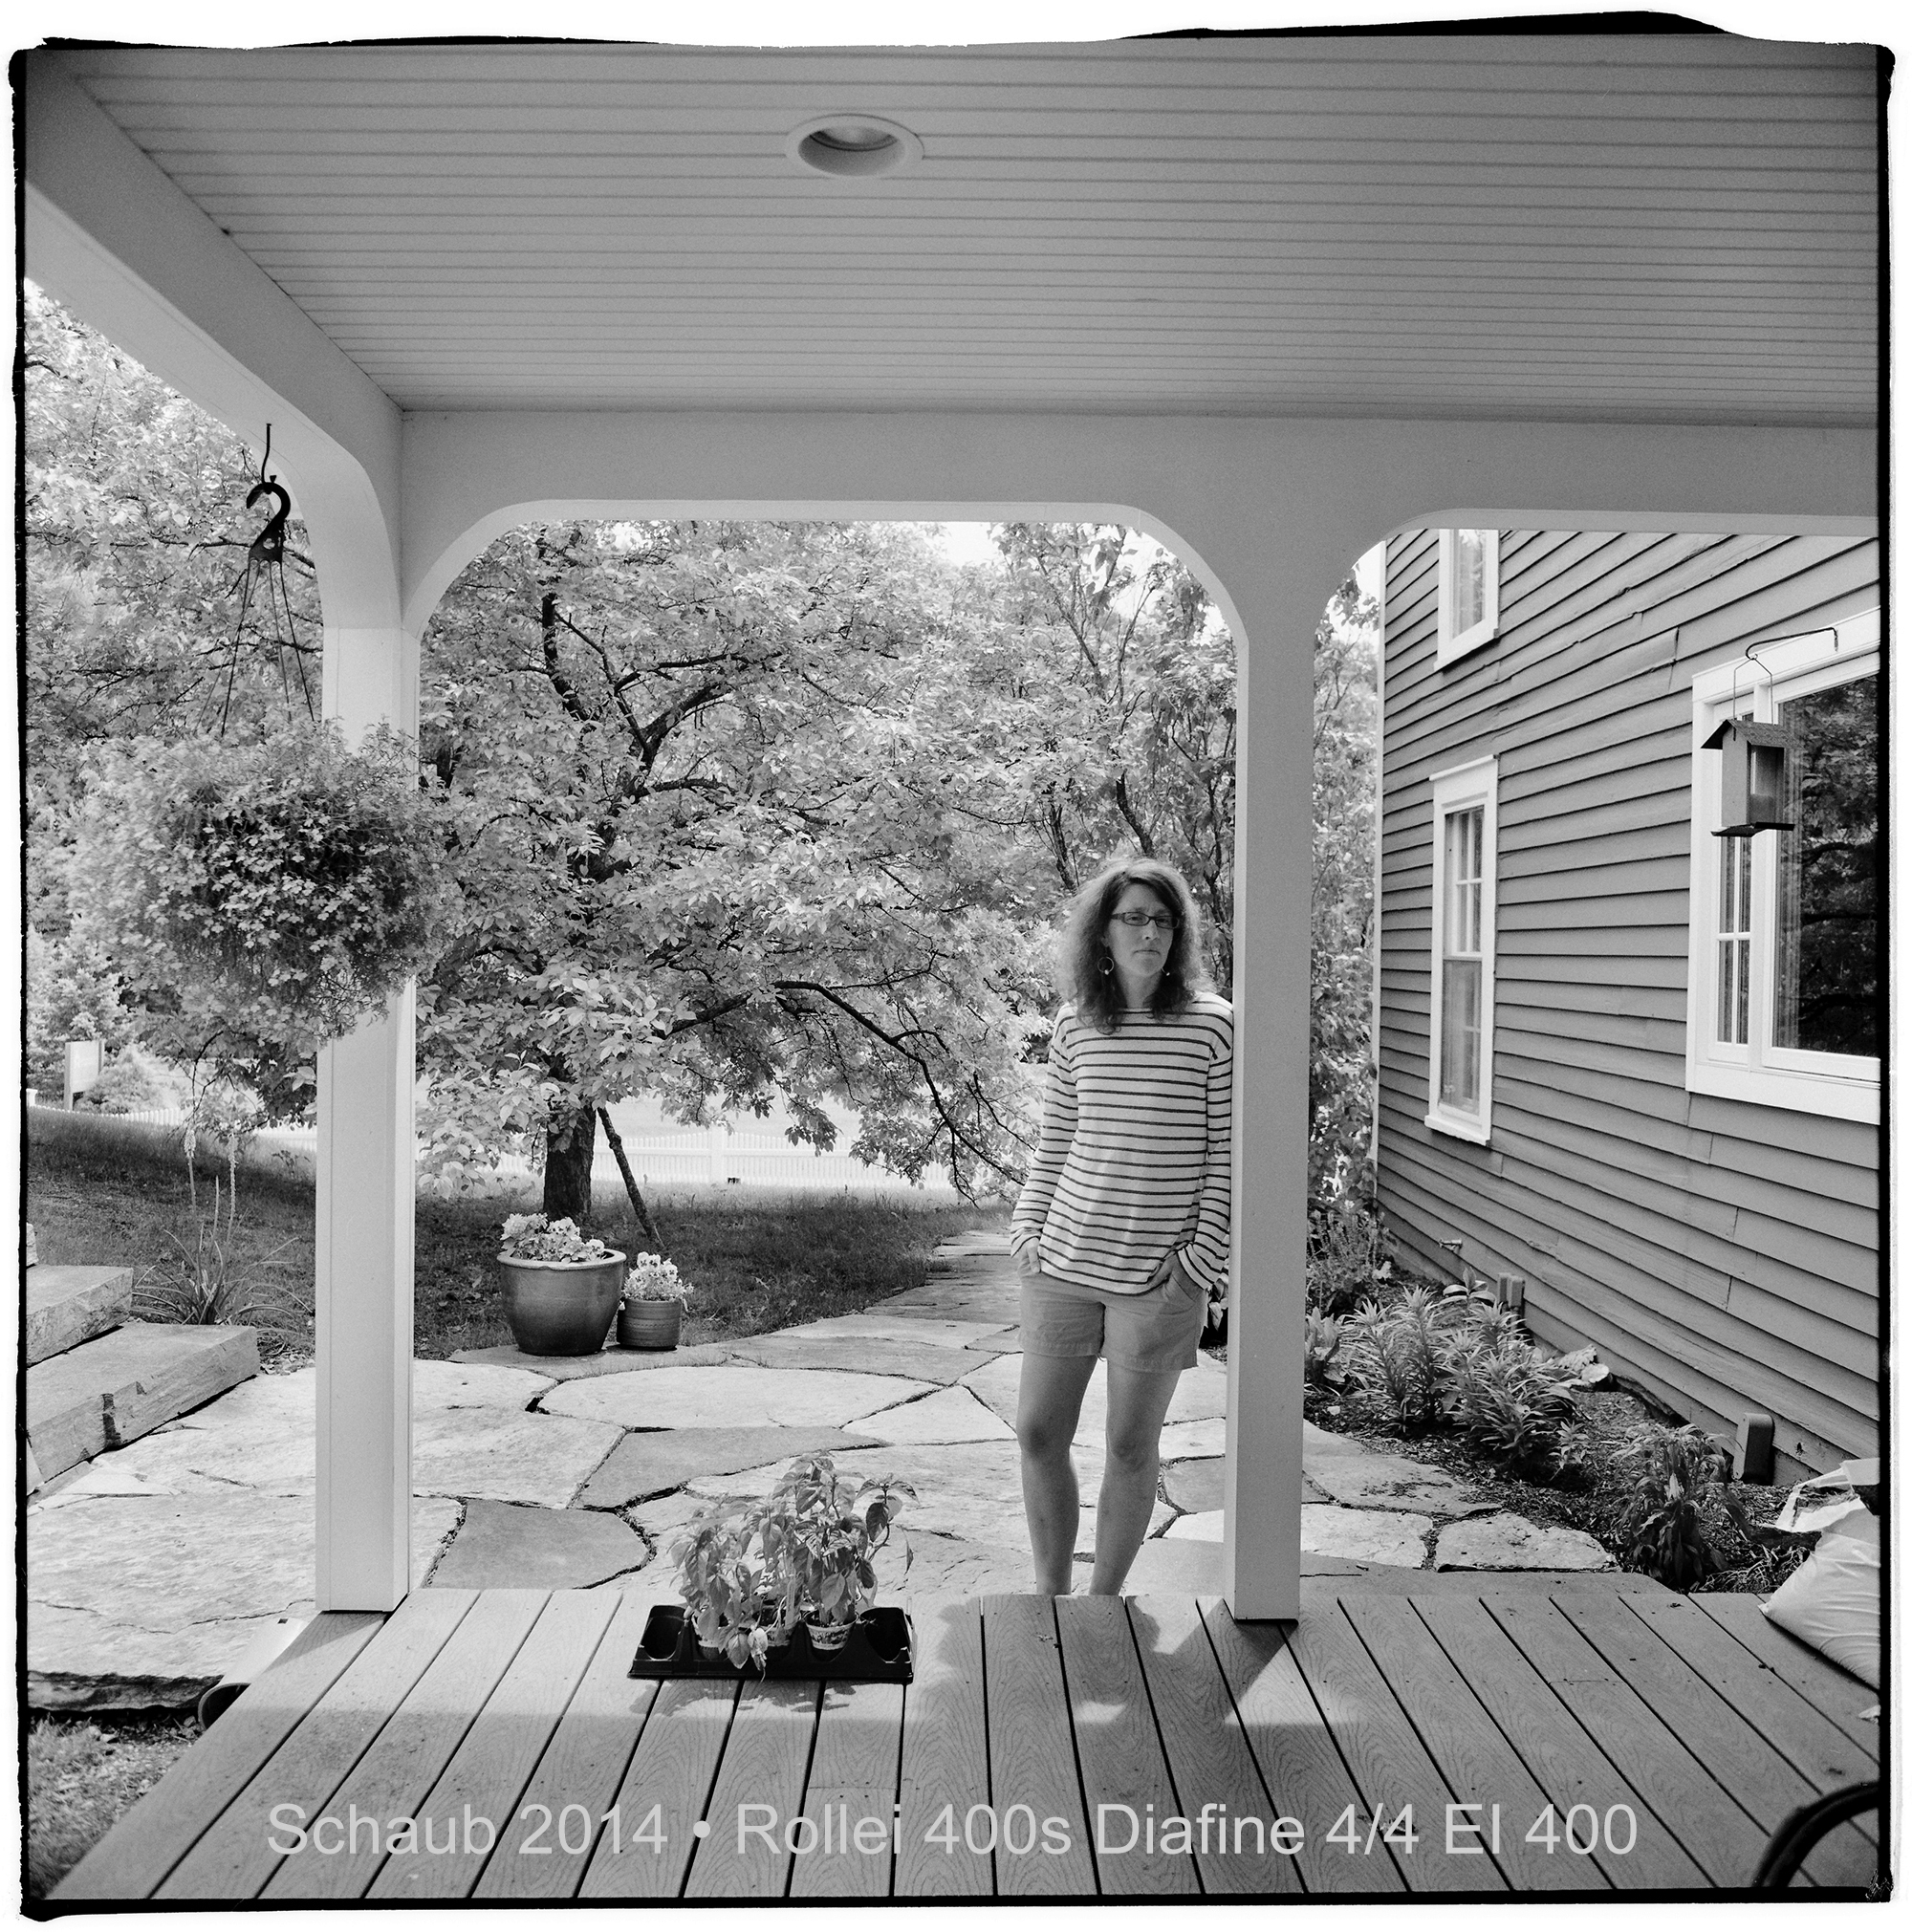
Amazing couple of days running dozens of different developer tests all with 400TX… love the look of the grain and depth of this film! In the end I came back to an old friend but with a new twist. Diafine is back in my life in a big way! Diluted 1:1 and used as a one shot developer it is spot on in my JOBO with very nice grain, great tonality, no processing issues and best of all a usable EI from about 100-1250 (the chart shows 200-1600… I think 1600 is a bit on the edge for my works but is totally usable in a pinch. So again, in a JOBO speed is 4, temp does not really matter but I ran at 75F, Dilute part A and B 1:1… I did 3.5 minutes in each followed by a 2 min wash with water then fix (box time), clear (box time) and hang to dry…. easy as pie!
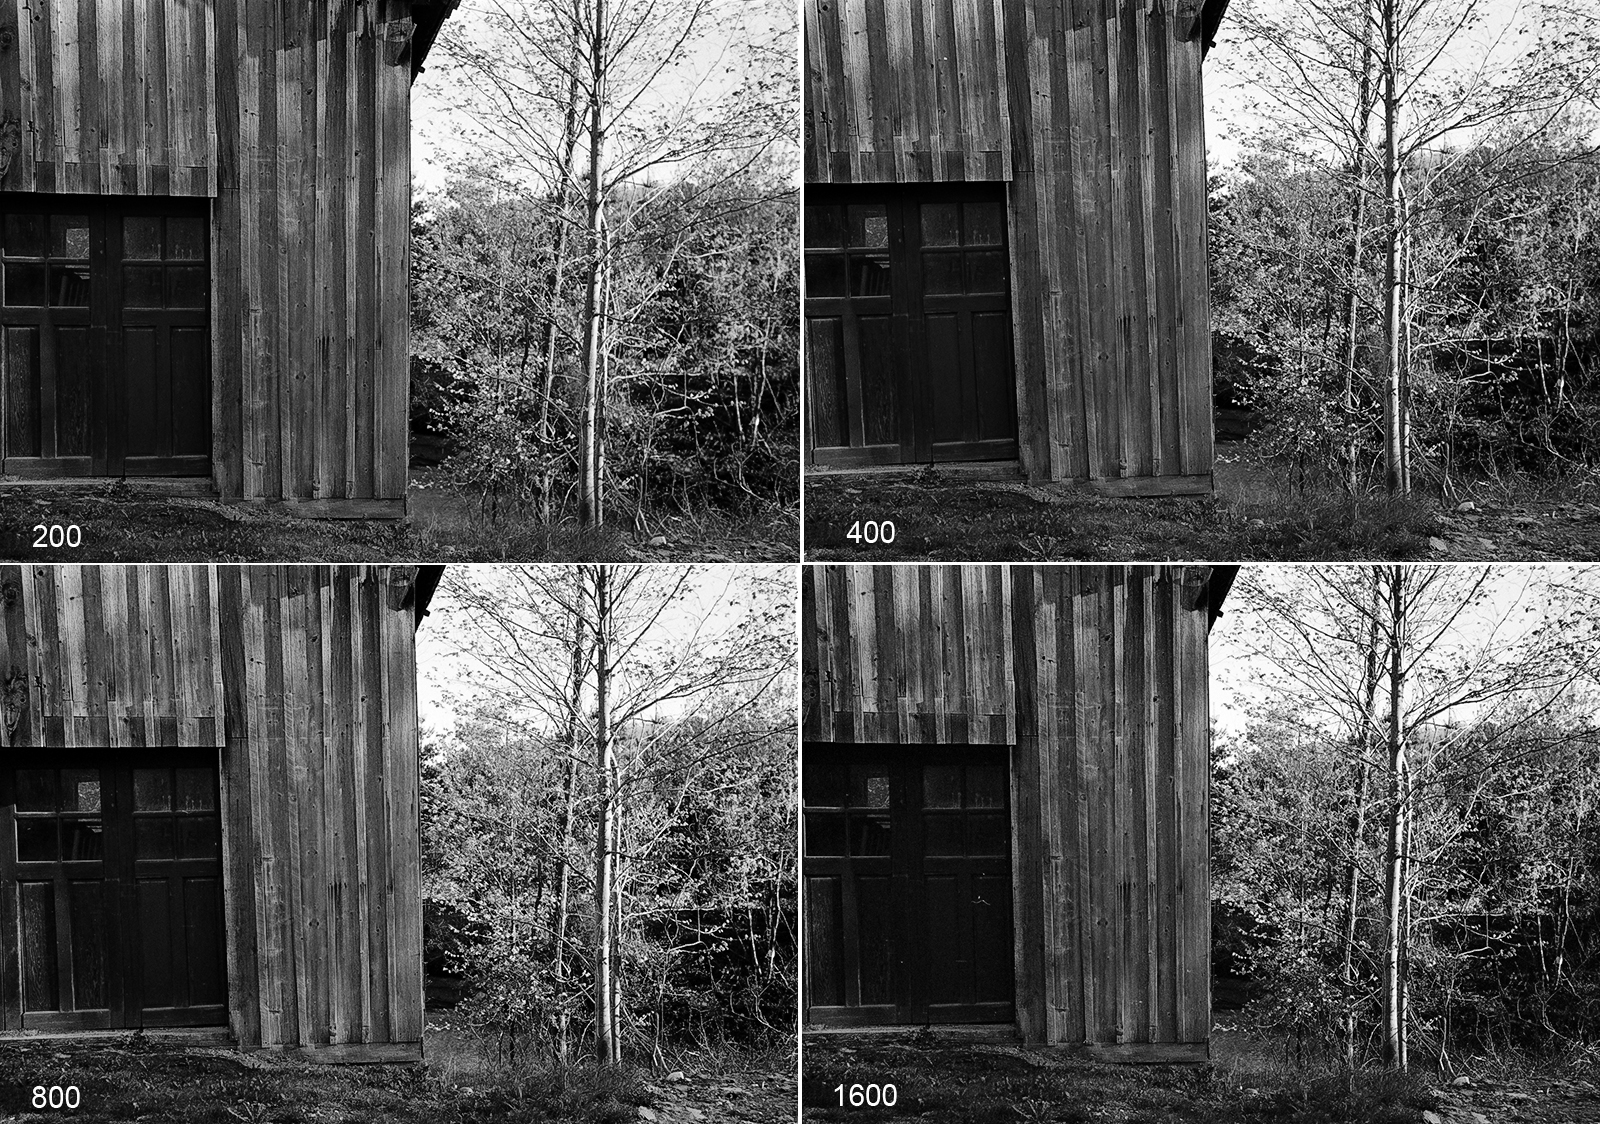
Of course an advantage of Diafine that I have written about here before is that many different films can be souped at the same time which is a huge time saver. Diafine negs are a bit flat and do requiere an “S” curve in PS to make me happy but I am now quite happy indeed. I will post links to Diafine articles I have written and a great one from a friend Sandy King from View Camera.
My suggest EI…. 800.
Viva la Revolution– Stephen
All images shot with a Leica MP with a 35MM Summicron ASPH… on Film!
LINKS:
Sandy King Article Diafine…. a must read!
as for articles here… there are a lot!!!! Just type in Diafine in the search box and enjoy!
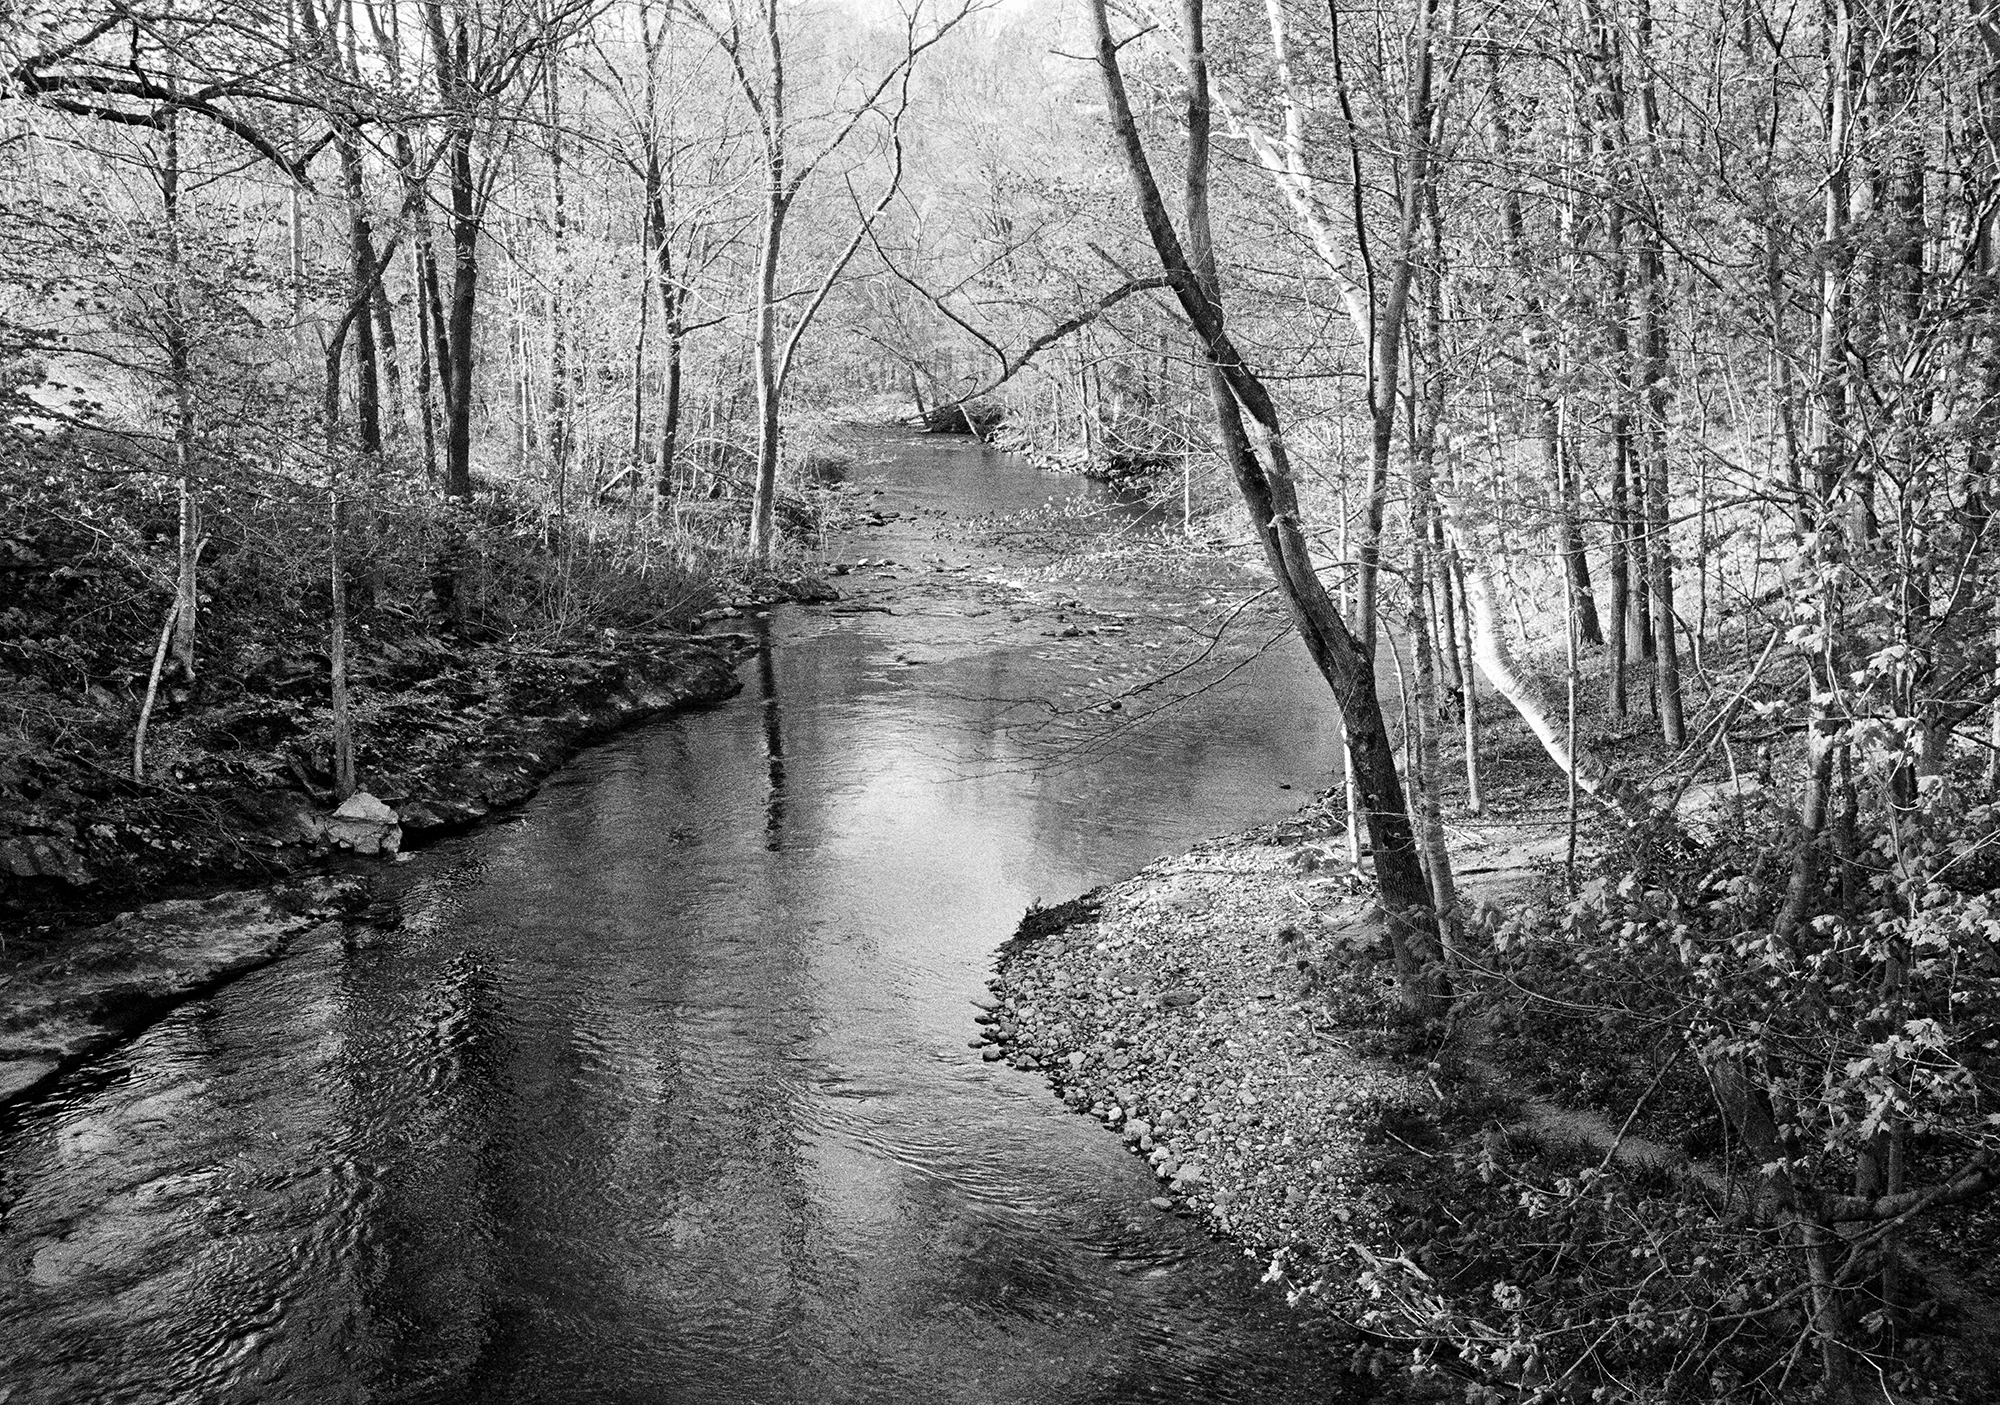
Also please note these were just quick scans (first set) as I am leaving tomorrow for a week of shooting but the final scan (last image) is quite nice and shows the real potential for this amazing combo.
Of course not the first camera of this kind and I do worry about the build quality BUT at $100 for the camera (lens and accessories are additional $$$$$$) it is quite interesting.

http://www.kickstarter.com/projects/wanderlust/travelwide-45-camera
As I said others options do exist and many with a better build quality and additional options, however, anything to keep film and LF alive is cool by me! Ive been shooting a lot of LF in the last few months… but more on that and a review of some LF films and processing options in a few weeks.
Viva la Revolution- Stephen

Click on the audio blog logo to listen to this 14 minute review of the last 10 years of photography from my perspective as a hybrid artist and where the industry is possibly going in the next decade.
To everyone I wish a safe and happy New Years and stay tuned for a new post in a few days.

Today I did finish my client work first and still had time to scan and complete 2 more images from my roll from yesterday…


Viva la Revolution- Stephen
Tech Stuff:

Just a quick post… I’ve been looking for an “affordable” Leica 28mm lens and was able to make the move last week as Leica has a $300 dollar rebate now available! I decided on the 28mm Elmarit F 2.8 ASPH for a few reasons:
1. It is really small and light and only blocks a very little bit of the lower right corner of the viewfinder on my M7 when the hood is attached- none when it is not.
2. According to test reports* it’s damn sharp (I agree)… see print below / link. Additionally it has very little distortion and a very nice OOF (out of focus) rendering.
3. I had owned the Voigtlander 28mm F 1.9 Ultron lens a few years back and was not really that impressed (so I sold it) and the Leica 28mm F2 ASPH Summicron was out of the question due to the cost and it is a larger lens which blocks more of the viewfinder.
So how good is this lens….

Print 1: Full size print 9.5″ x 25″. Printed on Hand-coated Fabriano Artistico 640 gsm.

Print 2: Crop 4.5″ x 4.5″ of Full Size 9.5″ x 25″ Print

Print 3: Crop 4.5″ x 4.5″ of Extreme Full Size 19″ x 50″ Print!
Note: The negative was scanned on an Imacon Scanner (wet mount) at 4725 optical dpi, 16 Bit… about a 500MB file. Film… Kodak Ektar 100.
Viva la Revolution-
Stephen
Want / need more information on the Leica 28mm Elmarit F2.8 ASPH… here is a link to a detailed review by Erwin Puts.

Buying used photographic gear can be a great way to save a few bucks and get that lens or camera body you’ve been dreaming of now. In this audioblog I outline a few suggestions to consider when buying used gear online or at a photographic store.
The artwork below was just made with my “used” Leica M7 and my “used” Leica 90mm Elmarit Lens.

Last Year’s Leaves, Vermont. 2009
From A New Eden
Leica M7 with 90mm Elmarit Lens
In Camera Overlapping Frame Panoramic Technique, 3X
Kodak Ektar Film
Printed 9.5″ x 25″ on Fabriano 640 gsm Rough, Hand Coated.
Copyright Stephen Schaub 2009

Print surface detail, hand-coated Fabriano.
I decided to have Blurb print and bind a second copy of A New Eden Volume 1 for two reasons…

Some More Thoughts:
THIS JUST IN- I like the Image Wrap cover with the premium paper as the best-of-all option- the dust jacket keeps falling off the book and drives me nuts. The dust jacket does have a better range of color than the image wrap, and is glossy but there is something nice to the look and feel of the image wrap, and on a small book with only 38 pages- like mine- as the extra material of the image wrap makes the spine look and feel nicer…the book just feels more complete. The premium paper is way nicer than the standard (I tried both) and really worth the few extra dollars. With regards to printing consistency… seems OK to me so far but I will continue to monitor and keep you posted if my thoughts change.
Biggest question: does this process make sense if you are selling your books? Services like Blurb are much less expensive than some other online publishing companies… that being said, the per book cost for my Eden project is now at almost $40. When I compare this to my similarly-priced second book Through A Glass Darkly -which is in a league all it’s own and beyond compare to anything Blurb or any online service can print or bind- it does give one pause. Once again, I think you need to think of a book like this as a very nice promotional piece, that you will at best maybe make a few bucks on… but ultimately with the ulterior motive of greater visibility for your works which will hopefully translate into print sales and other good things. I’d suggest a markup from Blurb’s cost at around 10%, it’s a fair percentage and at the same time keeps your per book cost at a point that is still marketable.
LINK: Publishing Your Own Photography Book, Part One.
Viva la Revolution – Stephen

Burning the midnight oil at Indian Hill Imageworks!!! Just how many patches are in the icc. test target?…over 2,200!!
Stay tuned for my thoughts/ review on my first tests: Rives BFK and Arches Platine!
Now back to printing!
Viva la Revolution!
Stephen
 Over the next few months I’ll be writing several articles on the LOMO LCA and LCA+. I’ve decided to use these small and very opinionated cameras for my new artwork series, entitled Vanishing Vermont. Articles will focus on working with these cameras, how to carry them, films to use and why… XPros, where to buy and differences in current and older models.
I know there are a lot of opinions out there (both pro and con) about the LOMO (LOMOGRAPHY) and I look forward to an open discussion, so first lets agree on two things: 1. Its the print that counts! 2. See number 1.
Here are a few helpful links to get things started…check them out and stay tuned!

Viva la Revolution!
