As you know I’ve been doing a lot of testing with Caffenol C in preparation for my book The Photographer’s Coffee Break but this morning I needed to run a quick test with Caffenol (no C) and Kodak 400TX… the results are really nice. With the Caffenol you get a usable film speed around 100 with nice contrast and grain… what’s not to like? Additionally, I have been spending time testing different methods to eliminate edge density which is very common on Caffenol and Caffenol C processed films- this morning I think I nailed it… more testing this afternoon but this image had no edge density which my previous tests with this film and others did have.
I just finished tweaking the Acros in Caffenol C and yes an EI of 1600 is very possible, as the sample image below shows… 3200 is just a tad past my liking but for some shots it would be usable. Click on both images to see a larger view.
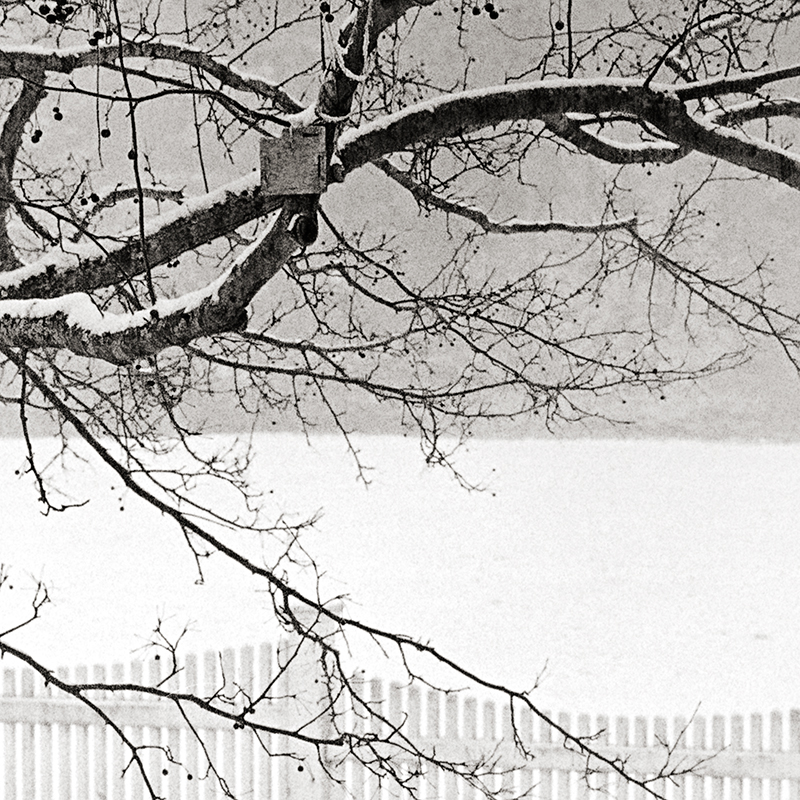
The dark barn boards above the windows were placed at Zone 3… they were EV 0. The detail outside the window fell on Zone 14. The detail image below is a 3″ x 3″ crop from a 20″ x 20″ print… pretty impressive.
My metering technique for these images is a stripped-down Zone approach that will be outlined in some detail in my next book The Photographers Coffee Break … I feel it fits the Caffenol C process quite well.
This is really amazing… with my final tweak the Caffenol C process is giving me Fuji Acros with a usable EI from 25-800… I suspect that 1200 would also be fine… this is all with the same processing time / technique. The scan was a s straight scan with no sharpening and each image was just set for proper contrast in PS… wow!
Wait till you see the TMAX 100… I’ll post it tomorrow, it is equally amazing.
I’ve been waiting since-yes –October2009 for this… Hasselblad has just released the newest version of FlexColor which supports Snow Leopard… YEAH! Visit Hasselblad.com for the software update…. now back to scanning!
The testing continues… BW400CN (C-41) by Kodak processed in my tweaked Caffenol C… the testing for this film is almost done… usable EI is around EI 50 – 400 / 800 all with the same processing time! Grain has a nice defined presence but not overpowering. A big advantage to this material beyond the flexability of the EI as mentioned above is the fact that is has fantastic reciprocity characteristics (no compensation required till 120 seconds) and it is very easy to scan on almost any scanner.
Below is a sample image shot with my Leica MP with a 28mm lens – the EI for this shot is 200. The dark barn board above the doors was placed at Zone 3… the light snow outside which has full detail is Zone 16!! This is a straight scan with minor adjustments in PS for contrast / levels… more soon.
Here is an example just for comparision of the same test shot on Kodak Tmax 400 processed in PMK using the technique outline here… instant coffee is looking pretty dam good!
Note: both shots were done using only natural light.
5″ crop from a 30″ print… do you see my dirty windows?
Crop from a 30″ print… do you see the screen?
“Normal” Scene.
5″ crop from a 30″ print… yes, it is snowing in the image.
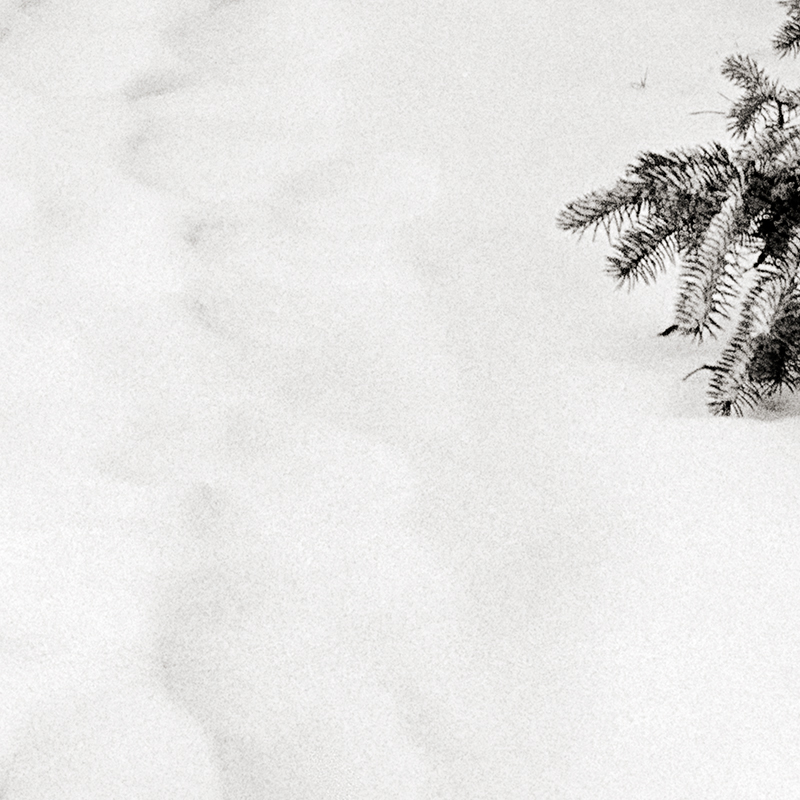
5″ detail crop of a 30″ print… look at the texture in the snow… Zone 8!
Few notes:
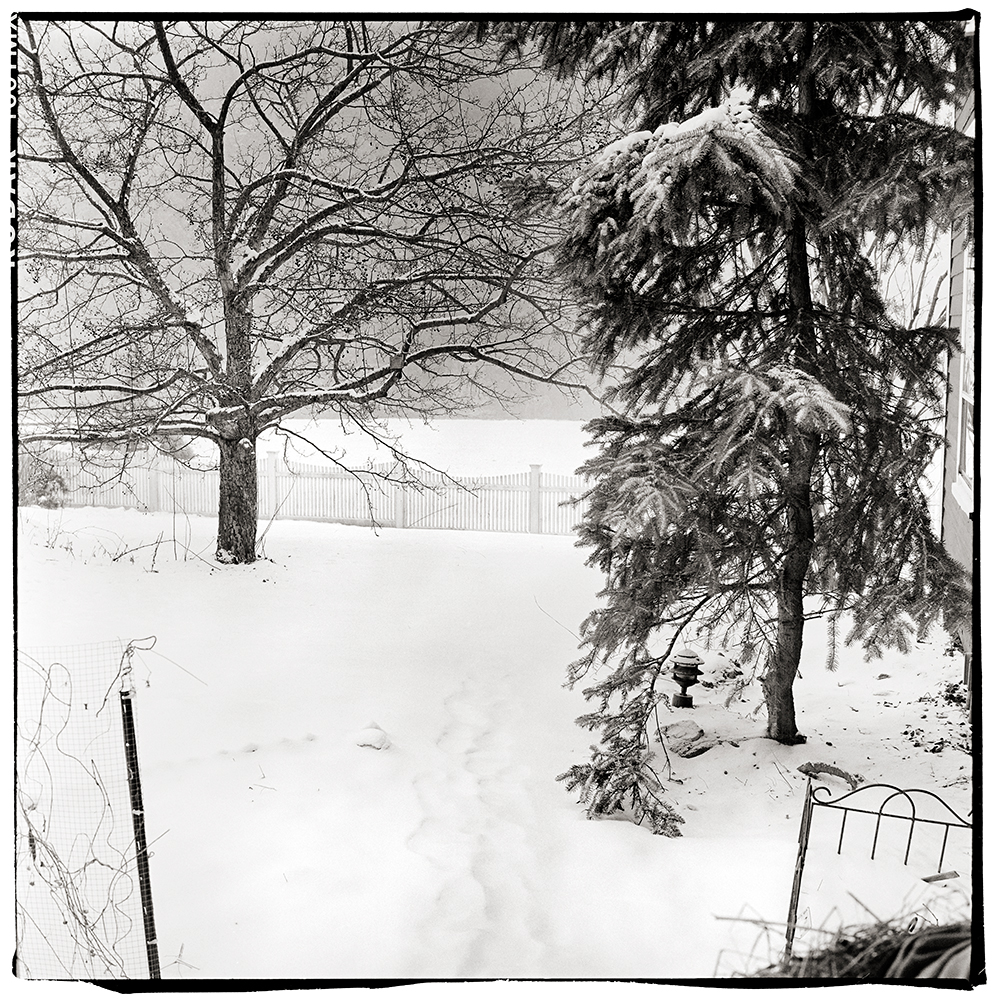
Both test images were shot on Kodak TMAX 100 at box speed.
The first test scene was very extreme… Zone 3 on the lower cabinets and the outside snow was Zone 14. The detail images are amazing and I really like how the grain is rendered.
In the second test scene I chose something that had a more “normal” range… deep shadows on the far right bush are Zone 3 and the lightest snow fell on a solid Zone 8… it was snowing during the test shots which is normal for Vermont this time of year, you can see the texture the falling snow makes in the background… the range is quite impressive and very easy to work with.
Both scans were straight scans (Imacon) with no sharpening and no noise reduction applied. In Photoshop my standard contrast adjustments were made with little to no effort. In both cases I had more than enough shadow information and a simple “S” curve did the trick… much like I would do with Diafine processed negatives.
When I compare these negative to the Fuji Acros negatives I find the Acros is a bit softer and the highlights tend to get very dense whereas the Kodak Tmax 100 negatives are a bit thinner looking but have full shadow detail and very controlled highlight density. The grain on the Tmax 100 in my opinion is a bit sharper than the Acros but both look really nice.
Both test images were shot on my 1960 Rollei TLR “F” (120). The first test image was at F5.6 at 1/4 sec and the second image was F11 at 1/30th.
How’s that for a great way to start the New Year!
Caffenol C Note:
I am working on a new book which will outline the technique I use for processing with Caffenol C and also give a starting direction for scanning and Photoshop adjustments to these negatives. I hope to finish sometime this winter so stay tuned.
Click on the audio blog logo to listen to this 14 minute review of the last 10 years of photography from my perspective as a hybrid artist and where the industry is possibly going in the next decade.
To everyone I wish a safe and happy New Years and stay tuned for a new post in a few days.